
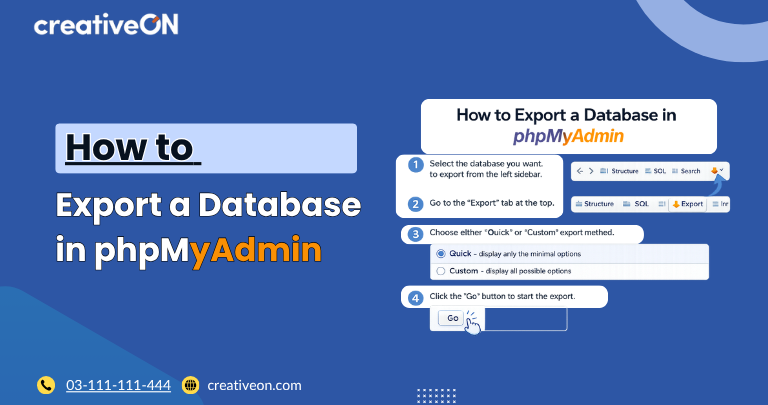
Exporting a database in phpMyAdmin creates a downloadable copy of your website’s data — usually as a .sql file. You’d do this before a site migration, before making risky changes, to troubleshoot an issue, or simply to keep a regular backup.
The process takes a few minutes and doesn’t require any command-line or advanced database knowledge. This guide covers both the Quick and Custom export methods, plus what to do when an export fails or times out.
Difficulty: Easy Estimated Time: 2–5 minutes Required Access: phpMyAdmin login with permission to view/export the target database
Before You Start
Make sure you have:
- Access to phpMyAdmin (usually through your hosting control panel)
- Permission to access the specific database you want to export
- Enough free storage on your computer for the exported file
- The right database identified — double-check the name before you begin
If your database is large, avoid running other heavy operations (imports, big queries) at the same time as the export — it increases the chance of a timeout.
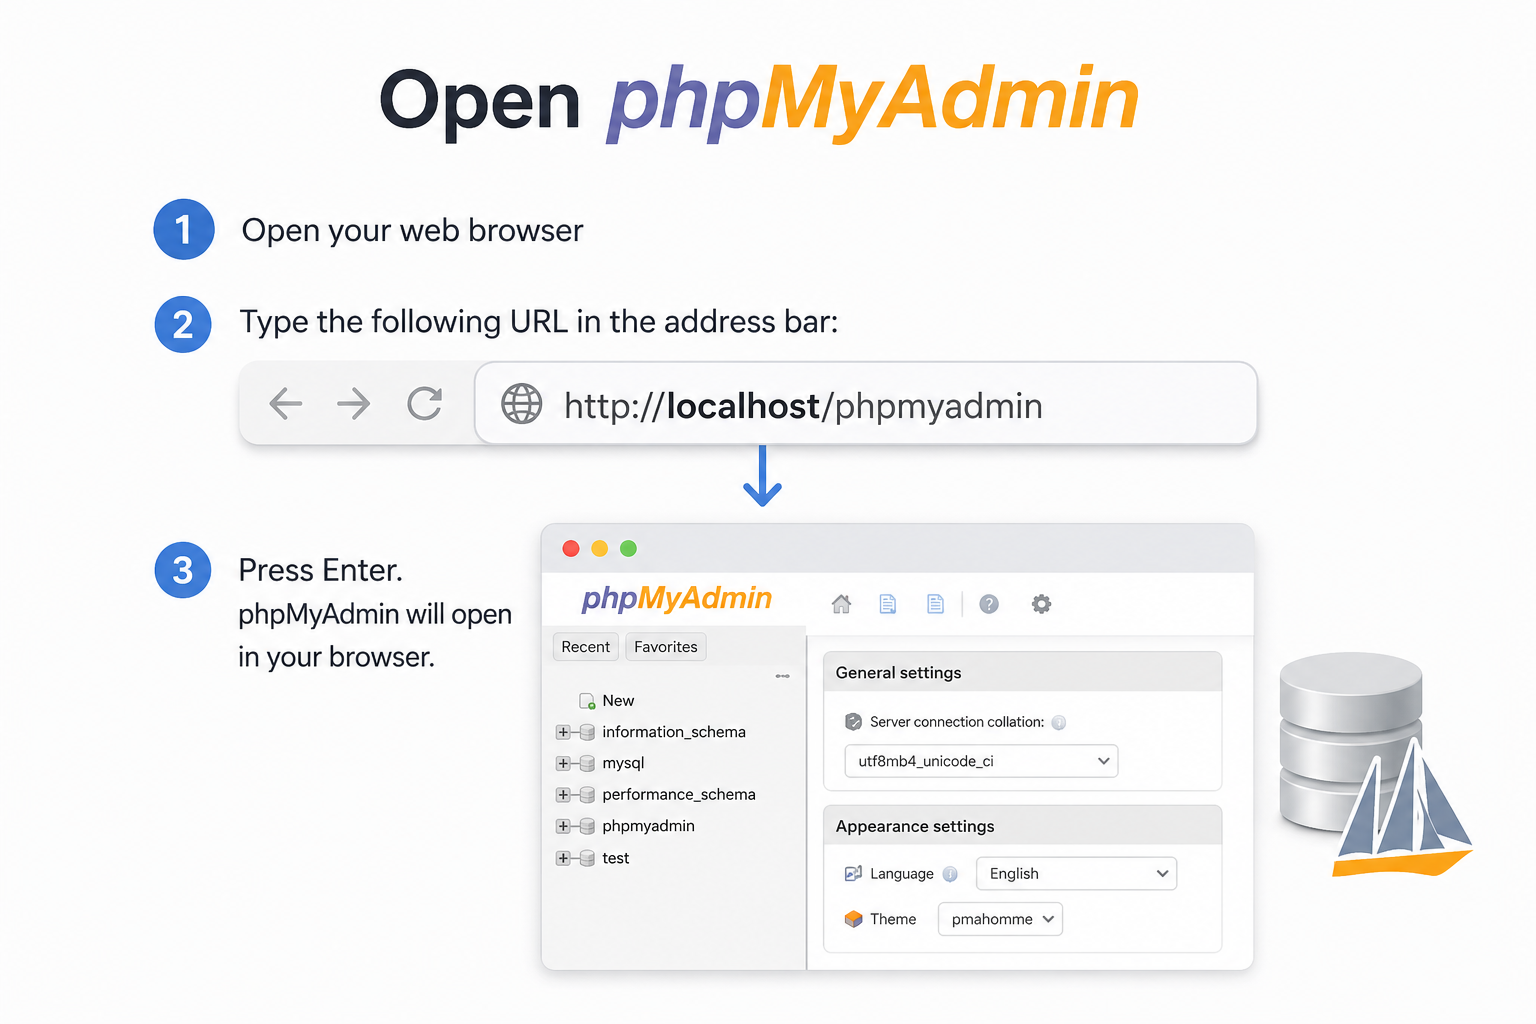
Step 1: Open phpMyAdmin
Log in to your hosting control panel and launch phpMyAdmin. The left sidebar lists every database your account can access.
[Screenshot: phpMyAdmin homepage with the database list in the left sidebar]
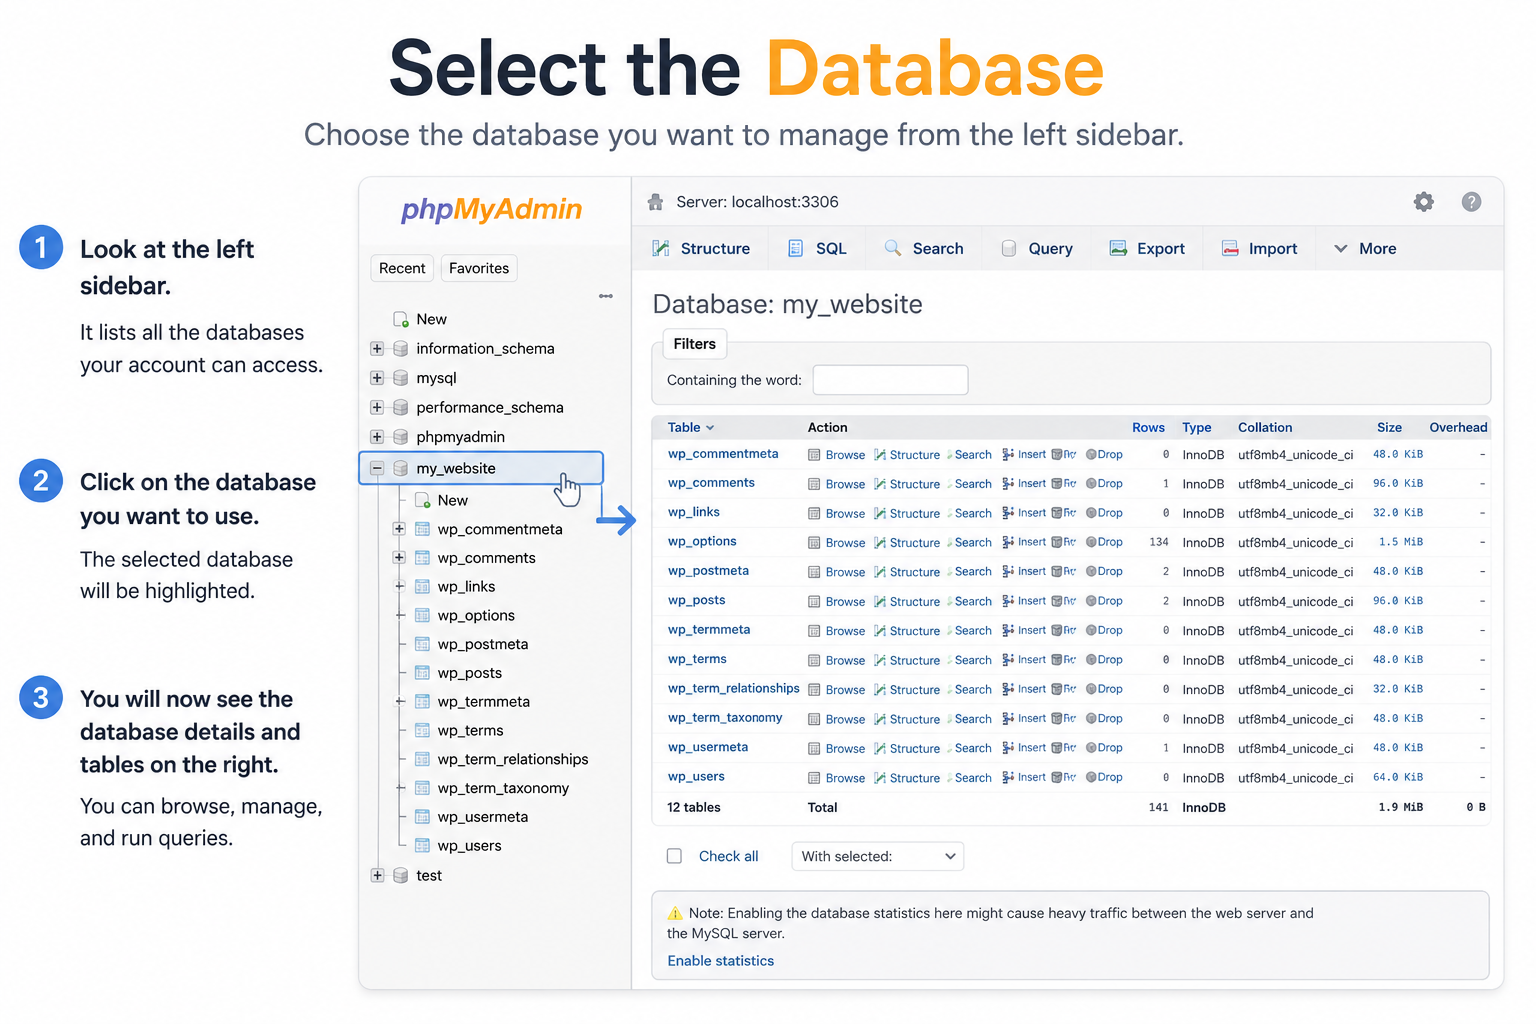
Step 2: Select the Database
Click the database you want to export from the left menu. phpMyAdmin will load and display all the tables inside it.
Take a second to confirm you’ve selected the correct one — exporting the wrong database is a common, easily avoidable mistake, especially on hosting accounts with several sites.
[Screenshot: Database selected, showing its list of tables]
Step 3: Open the Export Tab
With your database selected, click Export in the top navigation bar. phpMyAdmin will show two export methods:
- Quick
- Custom
Which one you pick depends on whether you want the whole database with default settings (Quick) or more control over what gets exported and how (Custom).
[Screenshot: Export tab with Quick/Custom method selector]
Method 1: Quick Export
Quick export is the fastest way to get a complete backup using sensible defaults. It’s the right choice for routine, “just back it up” situations.
- Select Quick as the export method.
- Choose SQL as the format.
- Click Export (or Go).
- Save the downloaded .sql file to your computer.
That file contains both the database structure (tables, indexes) and the data itself — everything needed to recreate the database elsewhere.
Method 2: Custom Export (Step by Step)
Custom export is worth using when you need to export only certain tables, compress the file, or adjust how the SQL is written (for example, for compatibility with an older MySQL version).
- Select Custom – display all possible options as the export method.
- Under Tables, uncheck any tables you don’t want included — or leave them all checked to export the full database with custom settings.
- Under Format, keep SQL selected for a standard database backup.
- Under Format-specific options, decide whether to include table structure, data, or both.
- Under Compression, choose zipped, gzipped, or bzip2’d if your server supports it — useful for reducing file size on larger exports.
- Click Export (or Go) to generate and download the file.
[Screenshot: Custom export screen showing table selection and compression options]
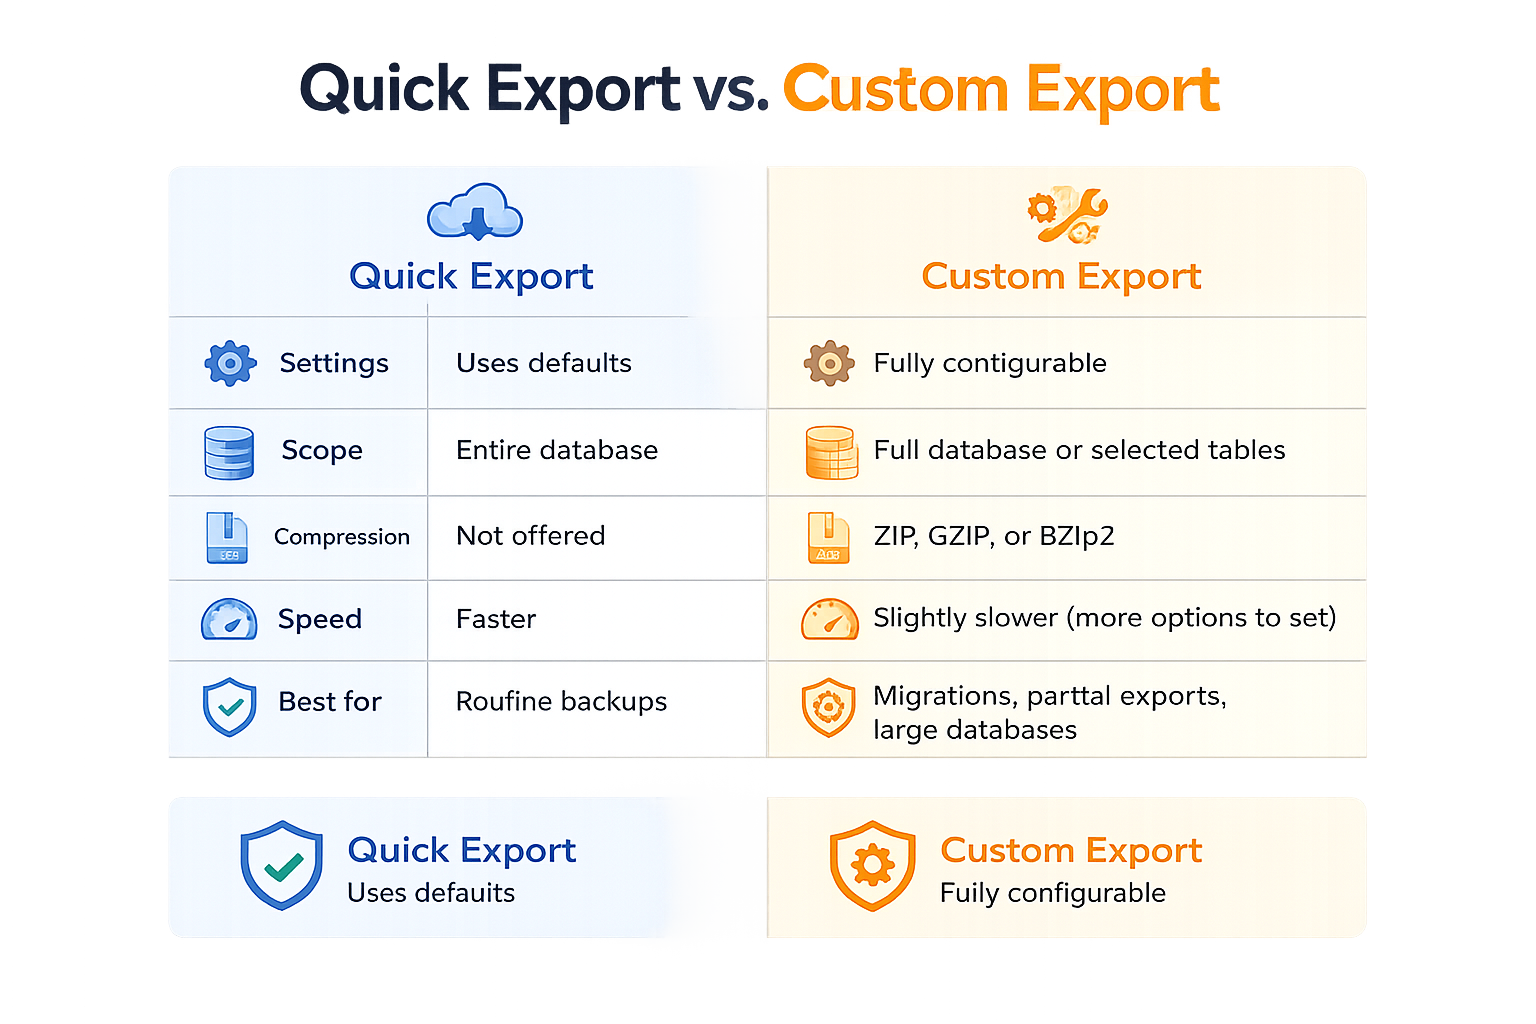
Quick Export vs. Custom Export
| Quick Export | Custom Export | |
| Settings | Uses defaults | Fully configurable |
| Scope | Entire database | Full database or selected tables |
| Compression | Not offered | ZIP, GZIP, or BZip2 |
| Speed | Faster | Slightly slower (more options to set) |
| Best for | Routine backups | Migrations, partial exports, large databases |
Which Export Format Should You Use?
SQL is the right choice for backups and migrations — it’s a full database dump that can recreate your tables and data on another server.
phpMyAdmin also supports several other formats, useful in specific situations:
- CSV – for opening data in Excel, Google Sheets, or other spreadsheet tools
- JSON – for feeding data into scripts or applications
- XML – for structured data interchange with other systems
- PDF – for a printable, human-readable report of table data
- Word / OpenDocument Spreadsheet (ODS) – for sharing data with non-technical stakeholders
Unless you have one of those specific needs, stick with SQL.
Exporting a Large Database
Large databases can be slow to export and are more prone to timing out, especially over shared hosting with strict PHP memory or execution-time limits. If your export doesn’t finish:
- Export selected tables individually instead of the whole database at once
- Enable GZIP or BZip2 compression to reduce output size
- Run the export during low-traffic hours
- Ask your host to temporarily raise PHP’s max_execution_time and memory_limit if exports consistently fail
- For very large databases, consider a command-line export (mysqldump) via SSH if you have access — it isn’t subject to browser or PHP execution limits the way phpMyAdmin is
Verify Your Exported File
Once the download finishes:
- Confirm the file actually exists and isn’t 0 KB
- Check that the file size is reasonable for your database’s contents
- Open the first few lines in a text editor to confirm it starts with SQL statements (e.g., — phpMyAdmin SQL Dump) rather than an error message
Use a clear naming convention so backups are easy to find later:
website-name-database-backup-2026-07-09.sql
Common Export Problems and Fixes
The download doesn’t start
Usually a browser or temporary server issue. Try refreshing phpMyAdmin, clearing your browser cache, or switching browsers.
The export stops or times out
Typically caused by PHP execution-time or memory limits on the server. Try exporting fewer tables at once, enabling compression, or asking your host to raise the relevant PHP limits.
“Access denied” during export
This means the logged-in database user doesn’t have export/view permissions for that database. Check the user’s privileges in phpMyAdmin’s User accounts section, or ask whoever manages hosting to grant access.
Best Practices for Database Exports
- Back up your database before any major site change (plugin updates, theme changes, migrations)
- Keep more than one backup version — don’t overwrite your only copy
- Store exported files somewhere other than the same server (local drive, cloud storage)
- Verify a backup opens/reads correctly before deleting an older one
- Use descriptive, dated filenames so you’re never guessing which backup is which
Frequently Asked Questions
