

Introduction
If you’re running more than one VPS for the same project — say, a web server talking to a database server, or an app server behind a load balancer — routing that traffic over the public internet is inefficient and unnecessarily exposed. Private networking between VPS instances solves this by letting your servers communicate over an internal, isolated network instead of the open internet.
This guide explains what private VPS networking does, when it’s useful, and how to configure and verify it correctly.
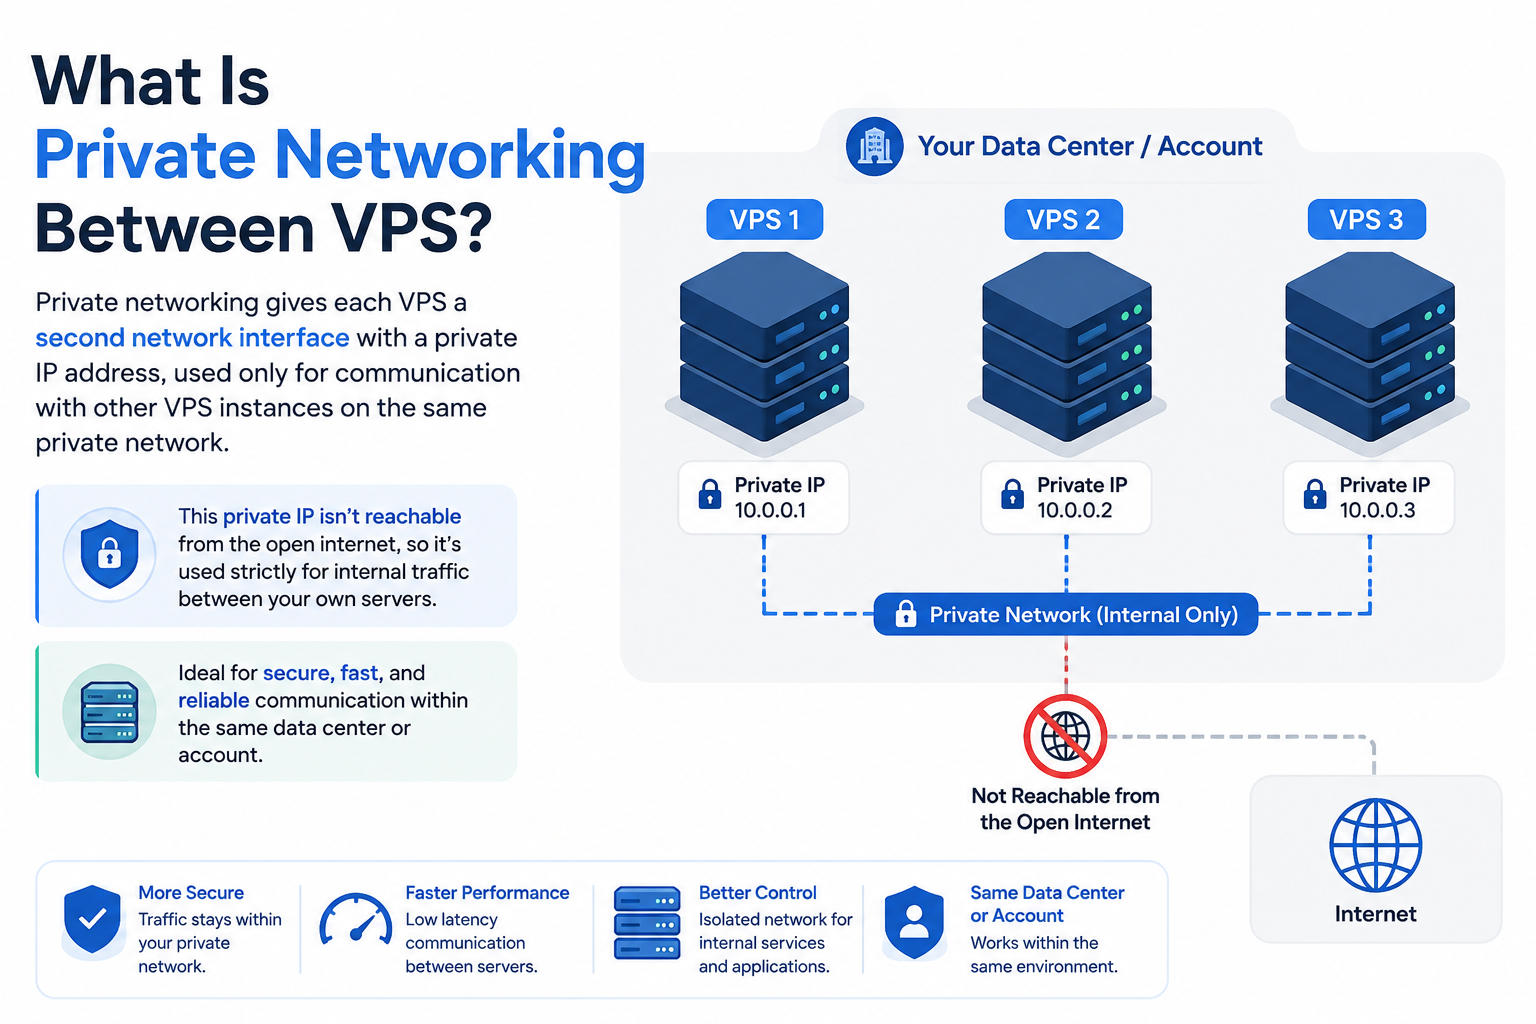
What Is Private Networking Between VPS?
Private networking gives each VPS a second network interface with a private IP address, used only for communication with other VPS instances on the same private network — typically within the same data center or account. Unlike your VPS’s public IP, this private IP isn’t reachable from the open internet, so it’s used strictly for internal traffic between your own servers.
Why Private Networking Between VPS Matters
When two VPS instances only have public IP addresses, every request between them — database queries, API calls, file transfers — travels out onto the public internet and back in again. This creates a few practical issues:
- Security exposure. Any service listening on a public IP is a potential target, even if it’s only meant to be used internally.
- Unnecessary latency. Public routing can take a longer path than a direct internal link between servers in the same data center.
- Bandwidth cost. Some providers count public internet traffic toward billable data transfer, while private network traffic may be free or discounted, depending on the plan.
A VPS private network is designed to help address these issues by isolating internal traffic from the public internet — though the exact benefits (cost, latency) depend on your provider’s specific network and billing setup.
When Should You Use Private Networking Between VPS?
Consider setting up private networking between VPS instances if:
- Your database server currently accepts connections from a public IP.
- You’re manually whitelisting application server IPs in firewall rules just to allow normal traffic.
- You’re seeing higher-than-expected bandwidth charges from inter-server traffic.
- You’re scaling to a multi-server architecture (web, app, cache, and database tiers).
- A security audit flagged an internal-only service as publicly reachable.
If any of these sound familiar, isolating internal traffic onto a private network is worth prioritizing.
How Private Networking Works on a VPS
Most VPS providers, including CreativeON, offer a private networking feature that attaches an additional virtual network interface to your VPS. Typically, this interface:
- Uses a private IP address range (commonly 10.x.x.x or 192.168.x.x).
- Is intended to communicate only with other VPS instances on the same private network, usually within the same data center or account.
- Is generally not routable from the public internet, meaning it normally can’t be reached from outside your infrastructure.
Exact behavior can vary by provider and plan, so it’s worth confirming the specifics for your own VPS setup before relying on it for sensitive traffic.
A Simple Example
Internet
|
Web VPS
(Public + Private IP)
|
Private Network
|
+———+———+
| |
App VPS Database VPS
(Private IP) (Private IP)
Visitors reach the web server over its public IP. Traffic between the web, app, and database servers stays on the private network and never touches the public internet.
Setting Up Private Networking Between VPS
The exact steps vary slightly by provider, but the general process follows the same pattern:
1. Enable Private Networking on Each VPS
From your hosting control panel, enable the private networking option for each VPS that needs to communicate internally. This provisions a second network interface on each server.
2. Assign and Confirm Private IP Addresses
Each VPS receives a private IP address on the same subnet. Log in to each server and confirm the interface is active:
ip addr show
You should see a second interface (often eth1 or similar) with a private IP address assigned.
3. Configure the Network Interface
Depending on your VPS provider and operating system, the private interface may be configured automatically, or it may require additional configuration to bring it up on boot rather than relying on a one-time manual assignment.
4. Update Application and Database Connections
Point internal services to the private IP instead of the public one. For example, update your application server’s database connection string to use the database server’s private IP rather than its public IP.
5. Restrict Public Access to Internal Services
Once private connectivity is confirmed, close off public access to internal-only services. This is a firewall configuration task — for a full walkthrough of rule sets and best practices, see our VPS Firewall Setup Guide.
Verifying the Private Network Connection
Before relying on the private network in production, confirm it actually works:
- Ping test: From one VPS, ping the private IP of the other. If ICMP is allowed, a successful response confirms basic reachability. If ping is blocked in your environment, test the required service or port directly instead.
- Service test: Attempt the actual application connection (e.g., a database client connecting via private IP) to confirm the service accepts private traffic.
- Public access test: Try reaching the internal service using its public IP from an external network. It should fail once firewall rules are correctly applied.
- Traffic monitoring: Check that internal traffic is now routing over the private interface rather than the public one. Ongoing traffic visibility is easier with dedicated monitoring in place — see our VPS Monitoring Guide if you don’t already have this set up.
Best Practices for VPS Private Networking
- Never expose internal-only services on public interfaces, even temporarily during testing.
- Use private IPs consistently across all internal service configurations, not just some of them — mixed configurations are a common source of confusion during troubleshooting.
- Combine private networking with firewall rules. Private networking limits exposure, but it isn’t a substitute for proper access control.
- Document your private IP scheme as your infrastructure grows.
Private Network vs. VPN
A private network provided by your host connects your own VPS instances directly, without any encryption tunnel, because the traffic never leaves the provider’s internal network. A VPN, by contrast, creates an encrypted tunnel that can connect servers across different networks, providers, or locations. If all your servers are with the same provider, private networking is usually simpler and faster; if you need to connect servers across providers, a VPN is typically the right tool.
Related VPS Guides
- VPS Firewall Setup Guide — for restricting access to services on both public and private interfaces.
- VPS Monitoring Guide — for tracking traffic and performance across your private network.
- VPS Server Hardening Checklist — for broader security measures beyond networking.
- Multi-region VPS Deployment — for how private networking behaves across data center regions.
- Zero Downtime VPS Migration — for maintaining private connectivity during server migrations.
Conclusion
Setting up private networking between VPS instances is one of the most effective ways to reduce unnecessary exposure in a multi-server setup. By moving internal traffic off the public internet, you can shrink your attack surface and, depending on your provider’s network and billing policies, potentially reduce bandwidth costs and improve latency between services. Once enabled, take the extra step of closing public access to internal-only services and verifying the connection — a private network only delivers its full benefit when it’s actually being used correctly. CreativeON VPS customers can use private networking where supported by their VPS plan, making it straightforward to build a properly isolated, multi-server architecture.
Frequently Asked Questions
