

Apache is a popular open-source web server used to host websites and web applications on Linux servers. It handles incoming HTTP requests and delivers website content to visitors through a web browser.
If you have an Ubuntu VPS and want to host a website, installing Apache is a good starting point. Ubuntu provides Apache through its official package repositories, making installation straightforward with a few terminal commands.
In this tutorial, you will learn how to install Apache on an Ubuntu VPS, start and enable the service, configure firewall access, and verify that your web server is working correctly.
The guide uses Ubuntu’s standard APT package manager and is suitable for supported Ubuntu Server releases.
Prerequisites
Before installing Apache, make sure you have the following:
- An Ubuntu VPS running a supported Ubuntu Server release.
- SSH access to your VPS.
- A user account with sudo privileges.
- An active internet connection on the server.
- Your VPS public IP address.
You should also have sufficient available disk space and memory for the services you plan to run.
If your VPS hosts production applications, consider taking a backup before making system-level changes.
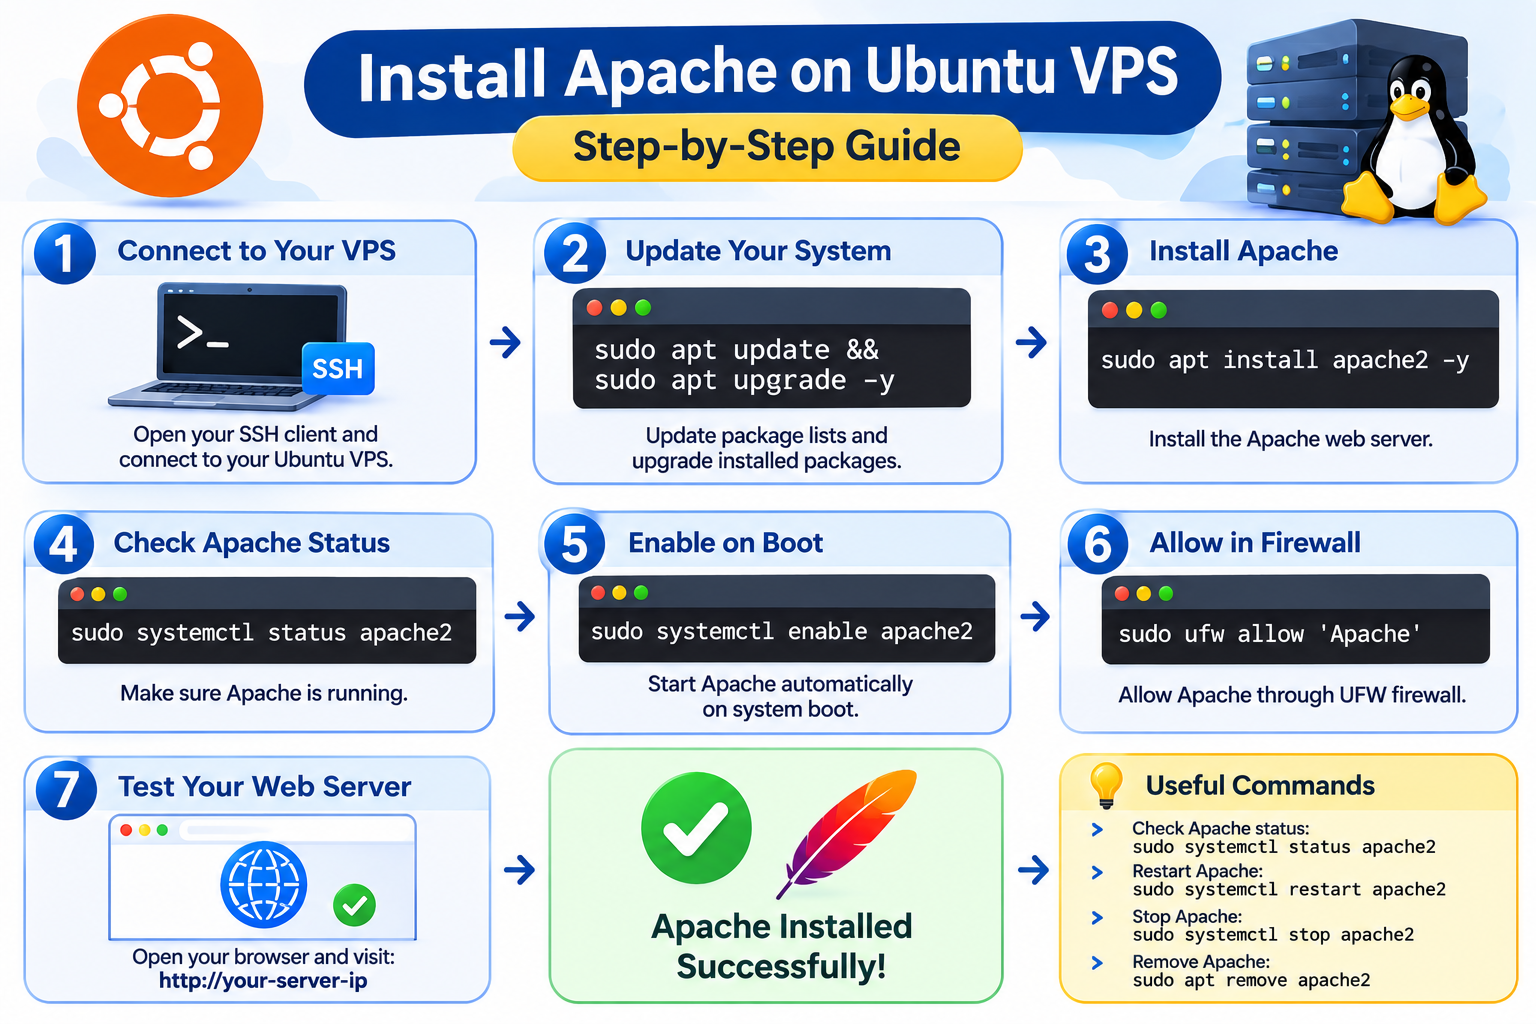
Step 1: Connect to Your Ubuntu VPS
First, connect to your Ubuntu VPS using SSH.
Open a terminal on Linux or macOS, or use an SSH client such as PuTTY on Windows.
Run the following command:
ssh username@your_server_ip
Replace username with your VPS username and your_server_ip with your server’s public IP address.
For example:
The IP address above is reserved for documentation purposes. Replace it with your actual VPS IP address.
Enter your password or authenticate using your configured SSH key.
Once connected, you can execute commands directly on your Ubuntu server.
Step 2: Update Ubuntu Package Lists
Before installing Apache, update the local APT package index.
This allows Ubuntu to retrieve the latest available package information from its configured repositories.
Run:
sudo apt update
Ubuntu will check the configured repositories and refresh the local package information.
You can also upgrade installed packages separately:
sudo apt upgrade
Review the proposed changes before confirming the upgrade, particularly if your VPS is running production applications.
A full system upgrade is not required to install Apache. Updating the package index is sufficient for the next step.
Step 3: Install Apache on Ubuntu VPS
Ubuntu provides Apache through its official software repositories under the package name apache2.
To install the Apache web server, execute:
sudo apt install apache2
APT will identify the required packages and dependencies.
If prompted for confirmation, type Y and press Enter.
Ubuntu will download and install Apache along with the necessary components.
After installation, you can check the installed Apache version using:
apache2 -v
The command displays the installed Apache HTTP Server version.
You can now proceed to start the Apache service and configure it to run automatically.
Step 4: Start and Enable Apache Service
After installation, check whether Apache is running:
sudo systemctl status apache2
If the service is running, you should see a status similar to:
Active: active (running)
If Apache is not running, start it with:
sudo systemctl start apache2
To make Apache start automatically whenever your VPS boots, execute:
sudo systemctl enable apache2
Alternatively, you can start the service and enable automatic startup with a single command:
sudo systemctl enable –now apache2
This ensures that Apache starts immediately and is configured to launch after future server restarts.
Step 5: Configure the Firewall for Apache
Even when Apache is installed and running, visitors may not be able to access your website if the firewall blocks incoming connections.
Ubuntu commonly uses UFW (Uncomplicated Firewall) to manage firewall rules.
First, check the firewall status:
sudo ufw status
If UFW is installed, list its available application profiles:
sudo ufw app list
Apache may provide the following profiles:
UFW profile | Port | Purpose |
Apache | 80 | Standard HTTP traffic |
Apache Secure | 443 | HTTPS traffic |
Apache Full | 80 and 443 | HTTP and HTTPS traffic |
Allow HTTP Traffic
To allow visitors to access your website through HTTP, run:
sudo ufw allow ‘Apache’
This permits incoming TCP connections on port 80.
Allow HTTPS Traffic
If you have configured SSL/TLS for your website, allow HTTPS traffic using:
sudo ufw allow ‘Apache Secure’
This permits incoming TCP connections on port 443.
Alternatively, if you want to allow both HTTP and HTTPS:
sudo ufw allow ‘Apache Full’
Allowing port 443 does not automatically install an SSL certificate or configure HTTPS. You must configure TLS separately.
Enable UFW Safely
If UFW is currently inactive and you intend to enable it, make sure SSH access is allowed first.
For the standard SSH port, execute:
sudo ufw allow OpenSSH
If your SSH service uses a custom port, allow that port instead.
Then enable UFW:
sudo ufw enable
Check the firewall configuration:
sudo ufw status
Important: Do not enable UFW without confirming that your SSH connection is permitted. Otherwise, you could lose remote access to your VPS. Also check whether your VPS provider has a separate network firewall or security group that needs to allow ports 80 and 443.
Step 6: Test Apache in Your Web Browser
After installing Apache and configuring HTTP access, test the web server using your VPS public IP address.
Open a web browser and enter:
http://your_server_ip
If Apache is installed and accessible, you should see the default Apache2 Ubuntu page.
This welcome page confirms that:
- Apache is installed on your Ubuntu VPS.
- The Apache service is responding to HTTP requests.
- The web server is accessible through the network.
- The default Apache website is being served.
If the page does not load, check the Apache service, firewall rules, and your VPS provider’s network firewall.
Step 7: Verify Apache Using the Terminal
You can also test Apache directly from the VPS without opening a browser.
Run:
curl -I http://localhost
If Apache is responding correctly, you should receive an HTTP response similar to:
HTTP/1.1 200 OK
Server: Apache/2.4.x
Content-Type: text/html
The actual Apache version and response headers may differ depending on your Ubuntu release and configuration.
This command sends an HTTP request to the local web server and displays the response headers.
You can also check the Apache configuration syntax:
sudo apache2ctl configtest
A successful configuration test should return:
Syntax OK
This command is particularly useful before applying changes to Apache configuration files.
Step 8: Understand Apache’s Important Directories
Ubuntu stores Apache configuration files, website content, and log files in specific directories.
Understanding these locations will help you manage your web server as your hosting requirements grow.
Directory or file | Purpose |
/etc/apache2/ | Main Apache configuration directory |
/etc/apache2/apache2.conf | Main Apache configuration file |
/etc/apache2/ports.conf | Defines listening ports |
/etc/apache2/sites-available/ | Stores available website configurations |
/etc/apache2/sites-enabled/ | Contains symbolic links to enabled website configurations |
/var/www/html/ | Default website document root |
/var/log/apache2/ | Stores Apache access and error logs |
The sites-available and sites-enabled directories are particularly important.
The first stores Virtual Host configuration files that are available for use. The second contains symbolic links to the configurations that are enabled.
This structure allows Apache to manage multiple websites using separate Virtual Host configurations.
You do not need to modify these directories for the basic installation covered in this tutorial.
Useful Apache Commands on Ubuntu
After installing Apache, you can manage the service through the systemctl command.
Here are some commonly used Apache commands:
Task | Command |
Start Apache | sudo systemctl start apache2 |
Stop Apache | sudo systemctl stop apache2 |
Restart Apache | sudo systemctl restart apache2 |
Reload Apache configuration | sudo systemctl reload apache2 |
Check Apache status | sudo systemctl status apache2 |
Enable automatic startup | sudo systemctl enable apache2 |
Disable automatic startup | sudo systemctl disable apache2 |
Check Apache version | apache2 -v |
Test configuration syntax | sudo apache2ctl configtest |
Tip: Use reload when you want Apache to apply supported configuration changes without a full service restart. Always run a configuration syntax test before applying significant configuration changes.
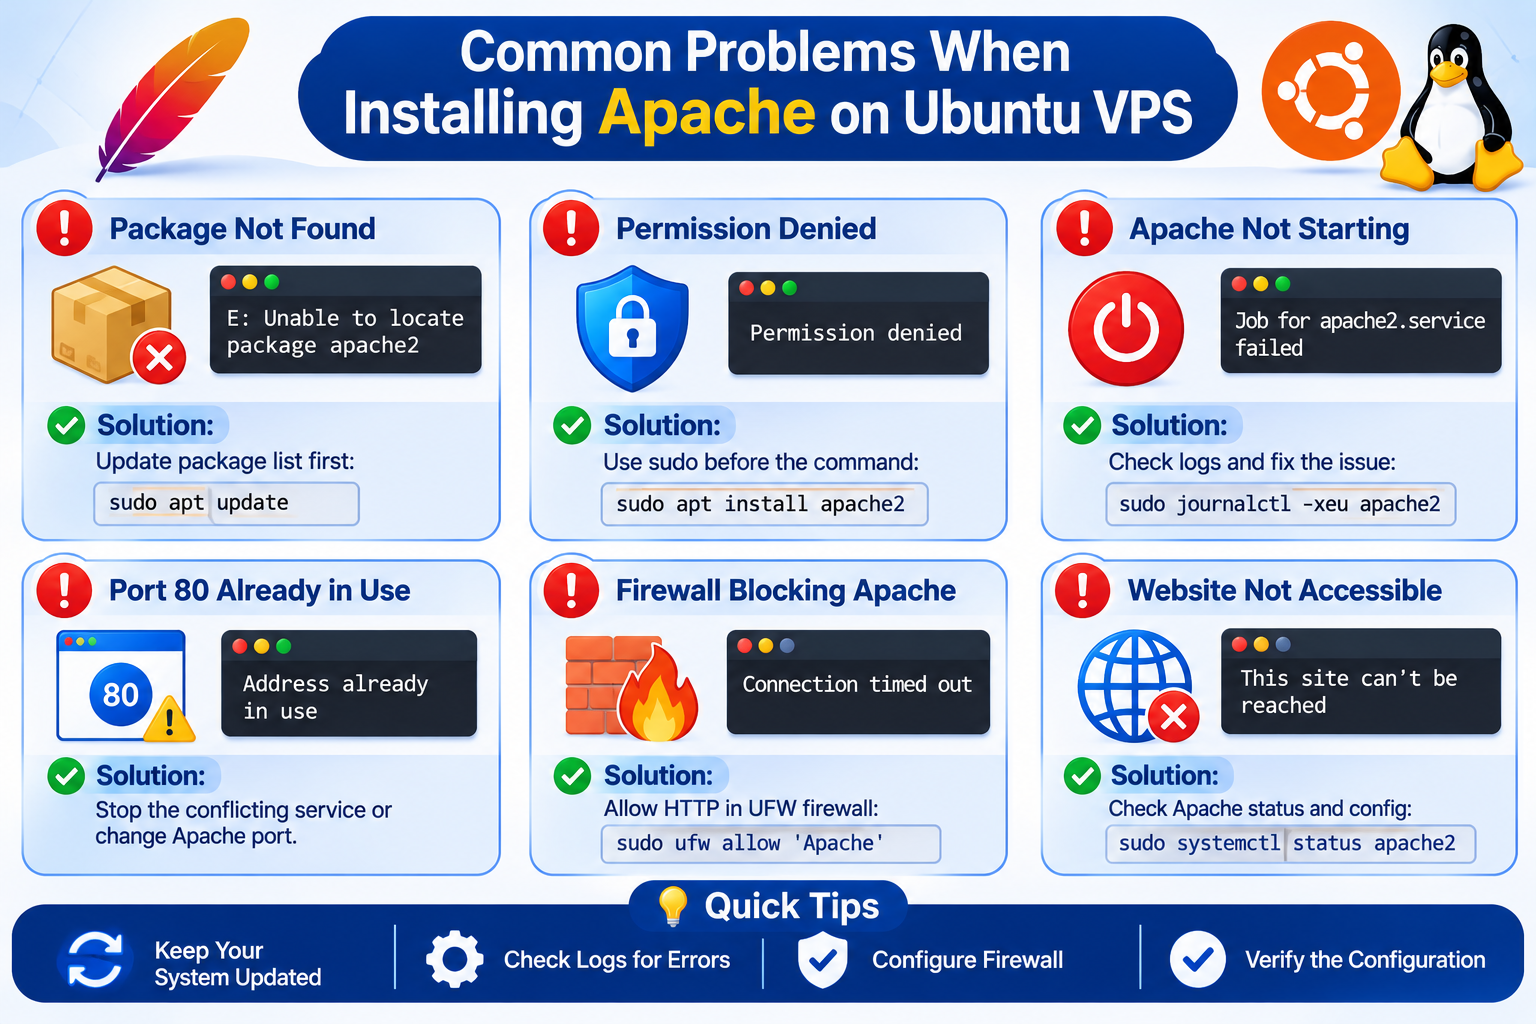
Common Problems When Installing Apache on Ubuntu VPS
Apache installation is usually straightforward, but you may encounter problems when starting the service or accessing your website.
Here are some common issues and ways to troubleshoot them.
1. Apache Default Page Is Not Loading
If your browser cannot display the Apache welcome page, check the following:
- Confirm that Apache is running.
- Verify that TCP port 80 is allowed through UFW.
- Check your VPS provider’s external firewall or security group.
- Make sure you are using the correct public IP address.
- Confirm that the server has network connectivity.
Check Apache’s status using:
sudo systemctl status apache2
You can also check whether Apache is listening on port 80:
sudo ss -ltnp | grep ‘:80’
2. Apache Service Is Not Starting
If Apache fails to start, inspect the service logs:
sudo journalctl -u apache2 -n 50 –no-pager
You can also check the Apache error log:
sudo tail -n 50 /var/log/apache2/error.log
These commands can help identify configuration errors, permission problems, port conflicts, and other service-related issues.
Run a configuration syntax test as well:
sudo apache2ctl configtest
Resolve any reported errors before attempting to restart Apache.
3. Port 80 Is Already in Use
Apache normally listens on TCP port 80 for HTTP connections.
If another web server or application is already using this port, Apache may fail to start.
To identify which process is listening on port 80, run:
sudo ss -ltnp | grep ‘:80’
Review the output to identify the service using the port.
If another web server is already running, investigate its configuration before stopping or changing it. Avoid disabling an existing service without understanding its role.
4. Firewall Is Blocking Website Access
If Apache works locally but cannot be accessed externally, check the firewall configuration:
sudo ufw status
Make sure HTTP traffic is permitted.
Also check your VPS provider’s network firewall if it is enabled. A provider-level firewall can block incoming connections even when UFW allows them.
What’s Next After Installing Apache?
Installing Apache is the first step toward hosting websites on your Ubuntu VPS.
Once the web server is working, you can configure additional components depending on your website requirements.
Some useful next steps include:
- Configure Apache Virtual Hosts: Host multiple websites using separate domain names and website directories.
- Install PHP on Ubuntu: Allow Apache to process PHP applications and dynamic websites.
- Install MySQL or MariaDB: Set up a database for applications that require data storage.
- Configure SSL/TLS: Secure website connections using HTTPS and an SSL certificate.
- Secure Apache: Review permissions, server settings, software updates, and security configurations.
You do not need to install all these components if you only intend to serve static HTML websites.
Frequently Asked Questions
