
SSH keys provide a secure and convenient way to authenticate with remote servers without entering an account password every time. They are commonly used by VPS administrators, developers, and system administrators to manage Linux servers, transfer files, and perform remote operations.
Instead of relying only on password-based authentication, SSH key authentication uses a pair of cryptographic keys: a private key and a public key. The private key stays on your local computer, while the public key is added to the remote server.
In this guide, you will learn how to generate SSH keys on Linux, Windows, and macOS, choose the right key type, protect your private key, and verify that your key pair has been created correctly.
What Are SSH Keys?
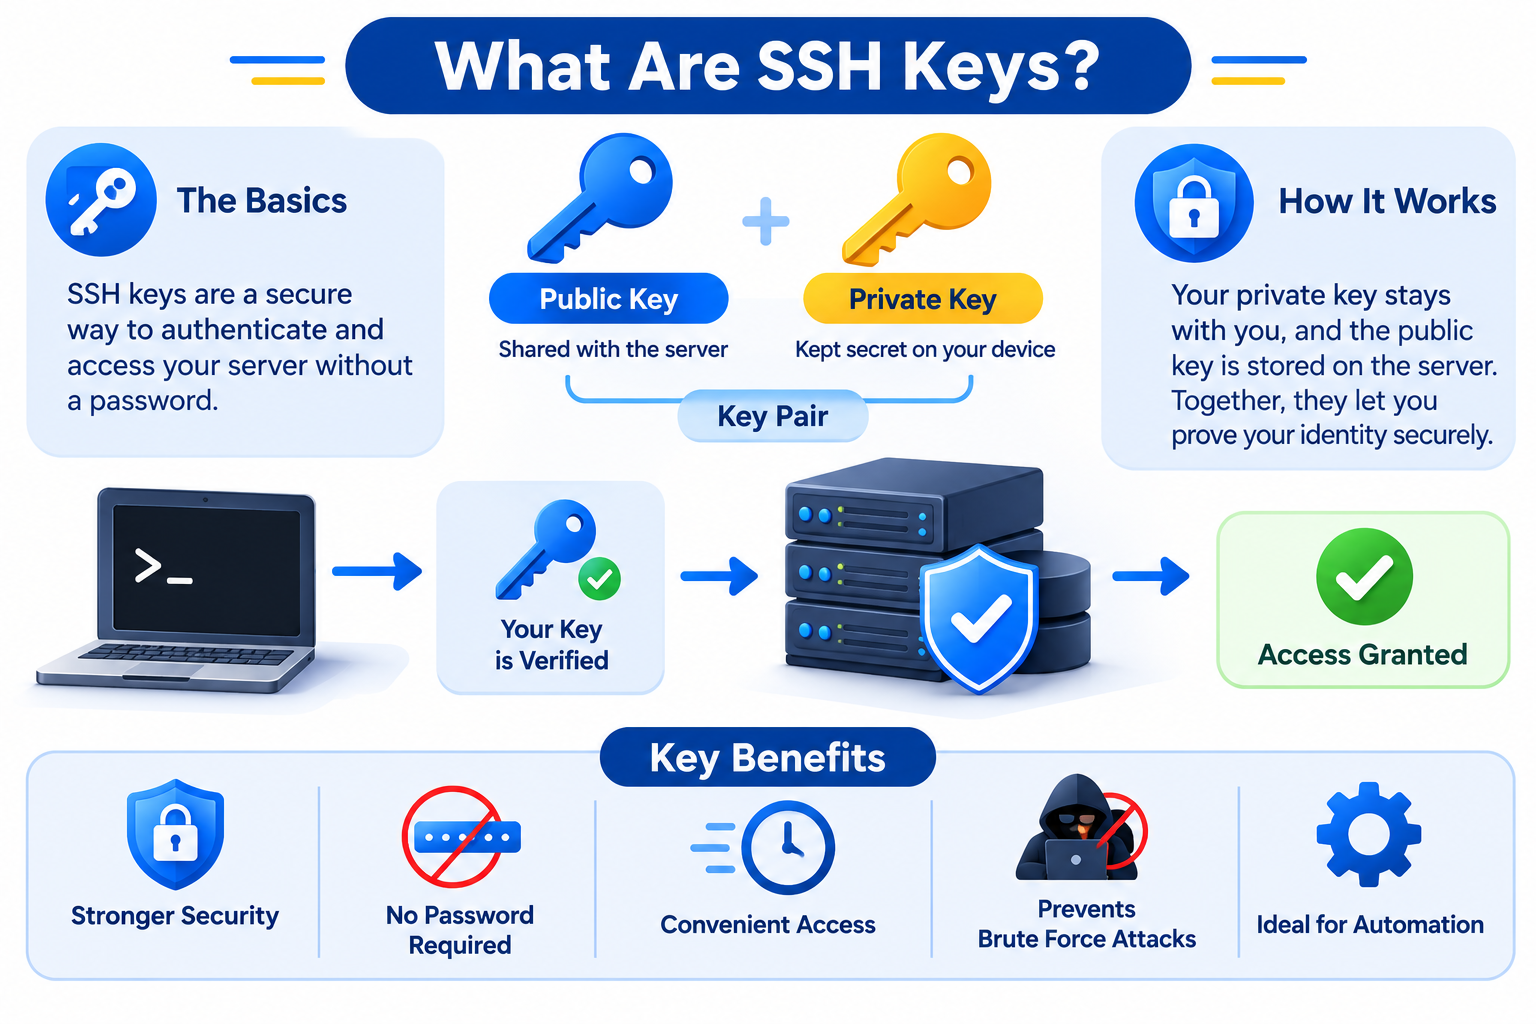
SSH keys are cryptographic credentials used by the Secure Shell (SSH) protocol to authenticate users when connecting to remote systems.
An SSH key pair contains two files:
- Private key: Stored securely on your local computer. It proves your identity during authentication and must never be shared.
- Public key: Added to the remote server. The server uses it to verify authentication attempts made with the corresponding private key.
During an SSH connection, the server challenges the client to prove possession of the private key. The authentication process verifies this proof without sending the private key to the remote server.
SSH key authentication is particularly useful for:
- Accessing Linux VPS and dedicated servers.
- Managing remote servers through SSH.
- Automating server administration tasks.
- Deploying applications and managing code repositories.
- Transferring files securely using SCP or SFTP.
Important: Generating SSH keys does not automatically enable key-based login. You must also install the public key on the remote server and ensure that its SSH service allows public-key authentication.
Which SSH Key Type Should You Use?
Before generating an SSH key, you should choose an appropriate cryptographic algorithm.
OpenSSH supports several key types, but Ed25519 is generally a good default for modern systems.
| Key type | Description | Recommendation |
| Ed25519 | Modern elliptic-curve cryptography with compact keys | Recommended |
| RSA | Widely supported and useful for legacy compatibility | Use RSA 4096-bit when required |
| ECDSA | Elliptic-curve-based authentication algorithm | Alternative where appropriate |
Ed25519
Ed25519 is a modern SSH key algorithm that provides strong security with relatively small keys and efficient operation.
It is generally recommended for new SSH key pairs when both the client and server support it.
RSA
RSA remains widely supported across different operating systems and older SSH implementations.
If you need compatibility with an older server that does not support Ed25519, RSA with a 4096-bit key is a practical alternative.
For most modern Linux VPS environments, start with Ed25519 rather than choosing RSA unnecessarily.
How to Generate SSH Keys on Linux
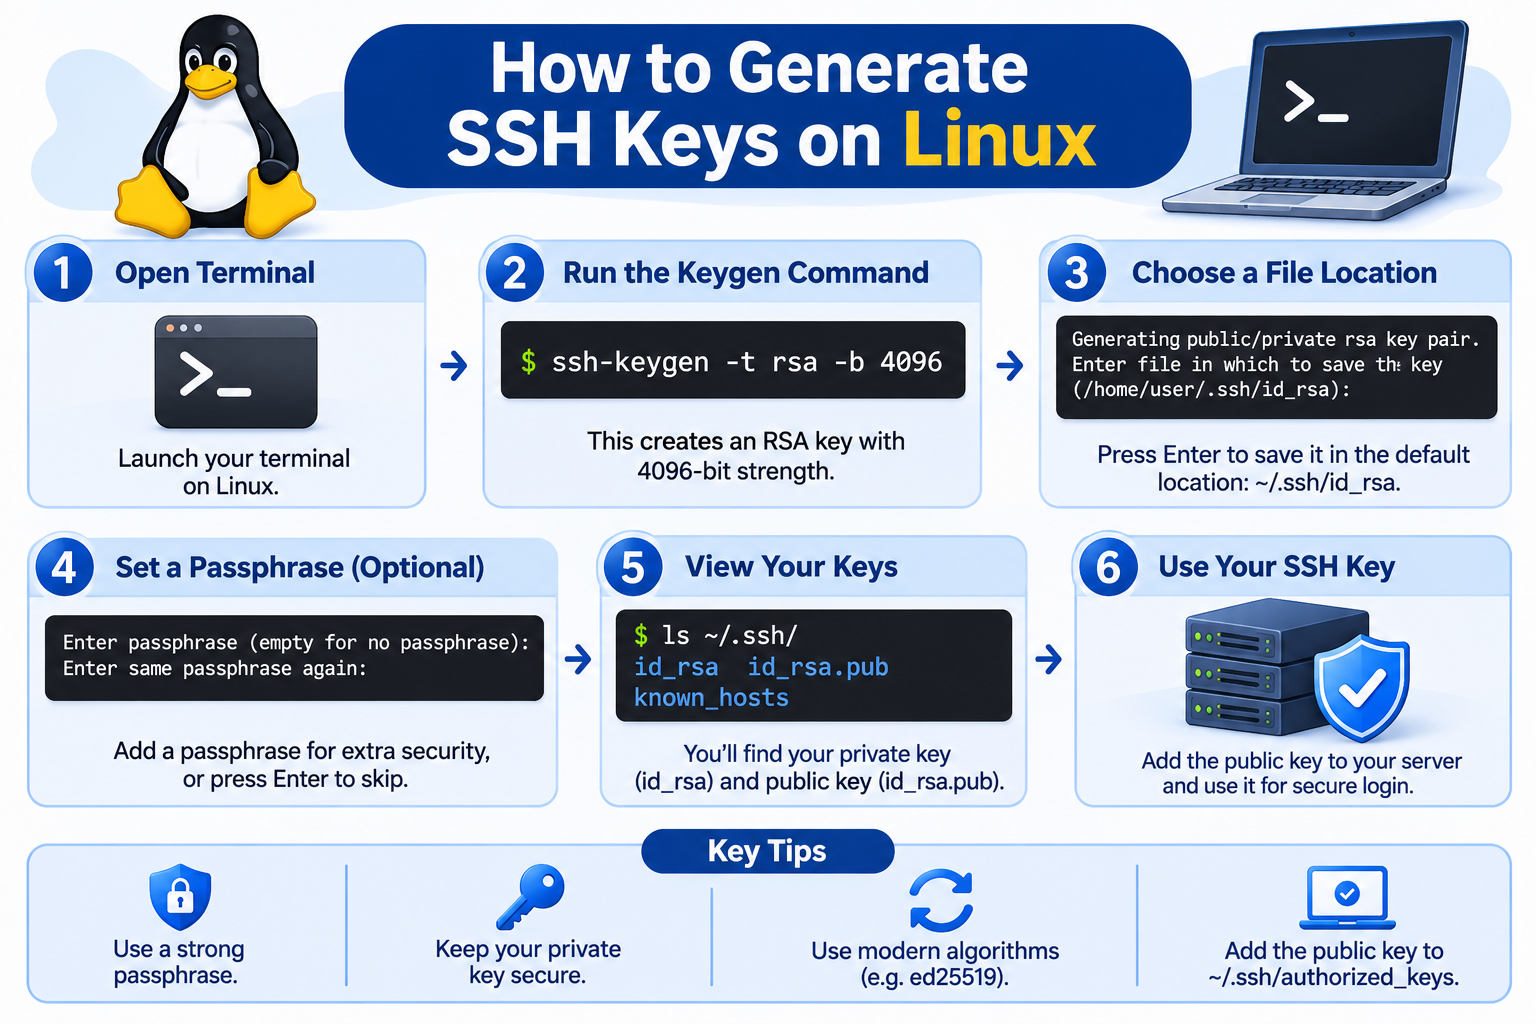
Most Linux distributions support SSH key generation through the OpenSSH client.
You can generate an SSH key pair using the ssh-keygen command.
Step 1: Check for Existing SSH Keys
Before generating a new key, check whether you already have one.
Open the terminal and run:
ls -la ~/.ssh/
Look for existing files such as:
id_ed25519
id_ed25519.pub
id_rsa
id_rsa.pub
If you already have a key, you can continue using it or generate a separate key with a different filename.
Avoid overwriting an existing private key unless you are certain it is no longer needed.
Step 2: Generate an Ed25519 SSH Key
Run the following command:
ssh-keygen -t ed25519 -C “[email protected]”
Replace [email protected] with an email address or another useful identifier.
The command options mean:
- -t ed25519: Selects the Ed25519 algorithm.
- -C: Adds a comment to identify the key.
Step 3: Choose the Key File Location
After running the command, you will see a prompt similar to:
Generating public/private ed25519 key pair.
Enter file in which to save the key
(/home/username/.ssh/id_ed25519):
Press Enter to use the default location.
If you want to create a separate key for a particular VPS or project, enter a custom filename instead.
Step 4: Set a Passphrase
You will be prompted to enter a passphrase:
Enter passphrase (empty for no passphrase):
Enter same passphrase again:
Enter a strong passphrase and confirm it.
A passphrase encrypts the private key file and adds another layer of protection if someone gains access to it.
You can also use an SSH agent to manage a passphrase-protected key without repeatedly entering its passphrase.
Step 5: Verify the Generated SSH Keys
Once the process finishes, your SSH key pair will be saved in the .ssh directory.
The default files are:
~/.ssh/id_ed25519
~/.ssh/id_ed25519.pub
You can list the files using:
ls -l ~/.ssh/
You should find:
- id_ed25519 – Your private key.
- id_ed25519.pub – Your public key.
Your SSH key pair has now been generated.
Step 6: Set Appropriate File Permissions
Your private key should not be accessible to other users on the system.
Run these commands:
chmod 700 ~/.ssh
chmod 600 ~/.ssh/id_ed25519
chmod 644 ~/.ssh/id_ed25519.pub
These permissions provide:
- 700 for the .ssh directory: Only the owner can access it.
- 600 for the private key: Only the owner can read and write it.
- 644 for the public key: The owner can modify it, while others can read it.
These are typical permissions for a personal SSH key directory.
How to Generate SSH Keys on Windows
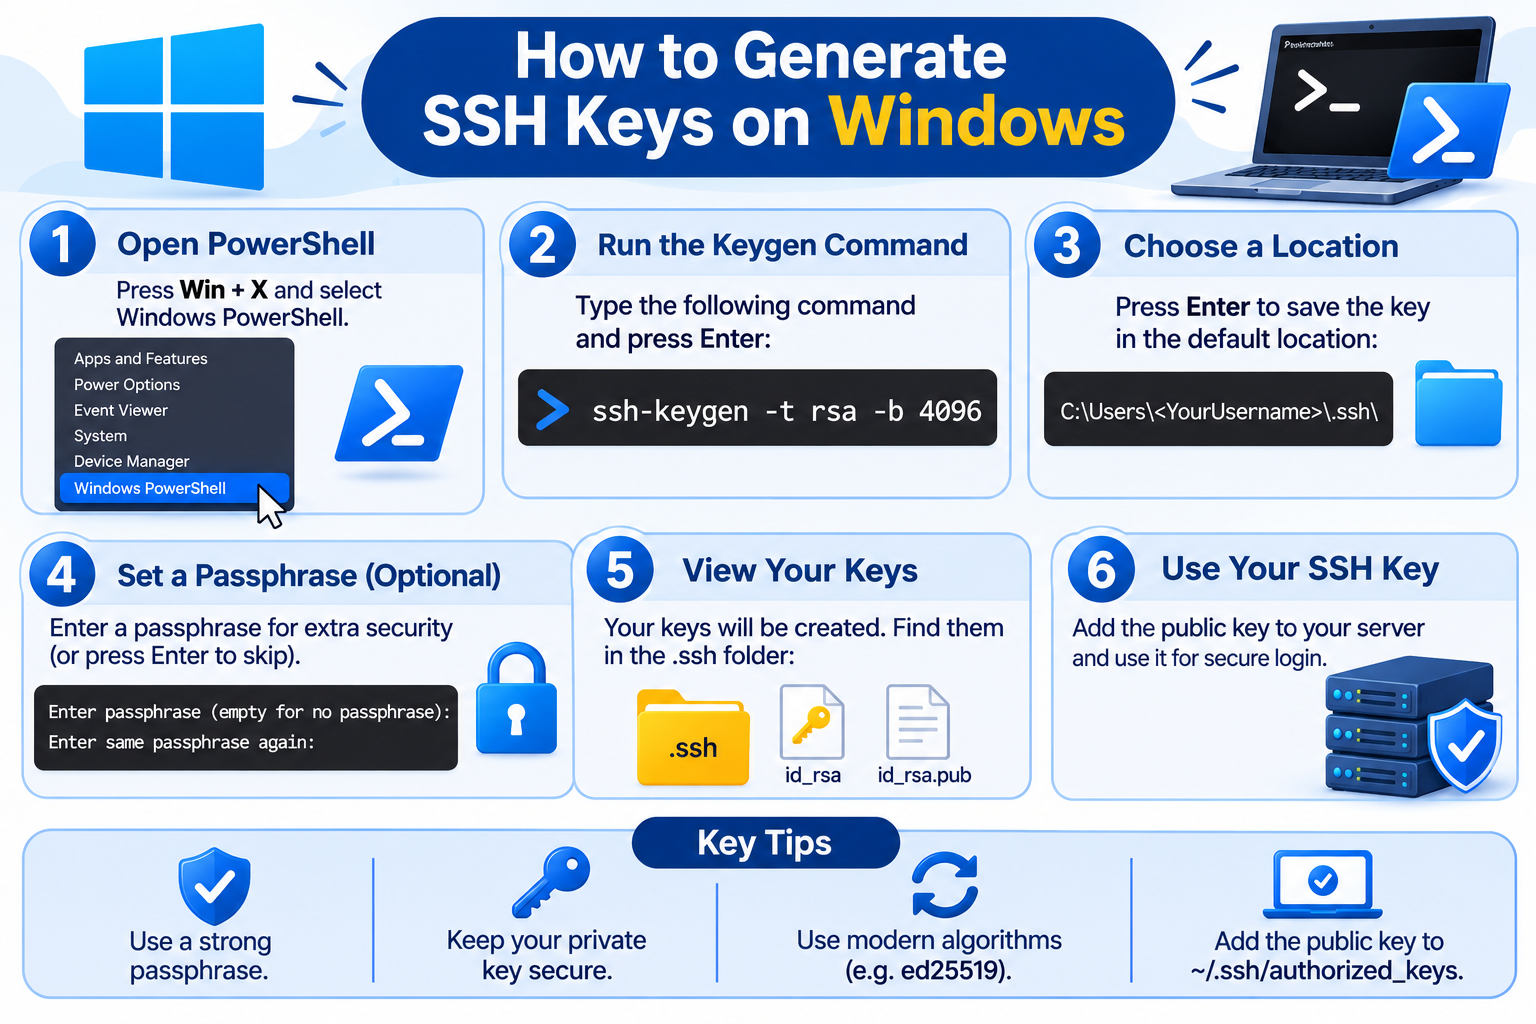
Windows 10 and Windows 11 support SSH key generation through the built-in OpenSSH Client when it is installed.
You do not necessarily need third-party software to create an SSH key pair.
Step 1: Check Whether OpenSSH Client Is Available
Open PowerShell and run:
ssh -V
If the command displays an OpenSSH version, the SSH client is available.
If Windows cannot recognize the command, you may need to install OpenSSH Client through:
Settings → System → Optional Features → View Features → OpenSSH Client
Step 2: Check for Existing SSH Keys
Run:
Get-ChildItem $env:USERPROFILE\.ssh
Check whether you already have an Ed25519 or RSA key pair.
If you need a separate key, use a custom filename rather than replacing an existing key.
Step 3: Generate an SSH Key Pair
Enter the following command in PowerShell:
ssh-keygen -t ed25519 -C “[email protected]”
Windows will start generating an Ed25519 key pair.
Step 4: Select the Storage Location
You will see a prompt asking where to save the generated key:
Enter file in which to save the key
(C:\Users\username/.ssh/id_ed25519):
Press Enter to accept the default location.
If you want a separate key for a particular VPS or server, provide a custom filename.
Step 5: Set a Passphrase
Enter a secure passphrase when prompted and confirm it.
This helps protect your private key if someone gains access to the file.
Step 6: Locate Your SSH Keys
By default, Windows stores SSH keys in:
C:\Users\username\.ssh\
The generated files are:
id_ed25519
id_ed25519.pub
You can display the public key in PowerShell using:
Get-Content $env:USERPROFILE\.ssh\id_ed25519.pub
You can then copy the public key when configuring SSH access to your VPS.
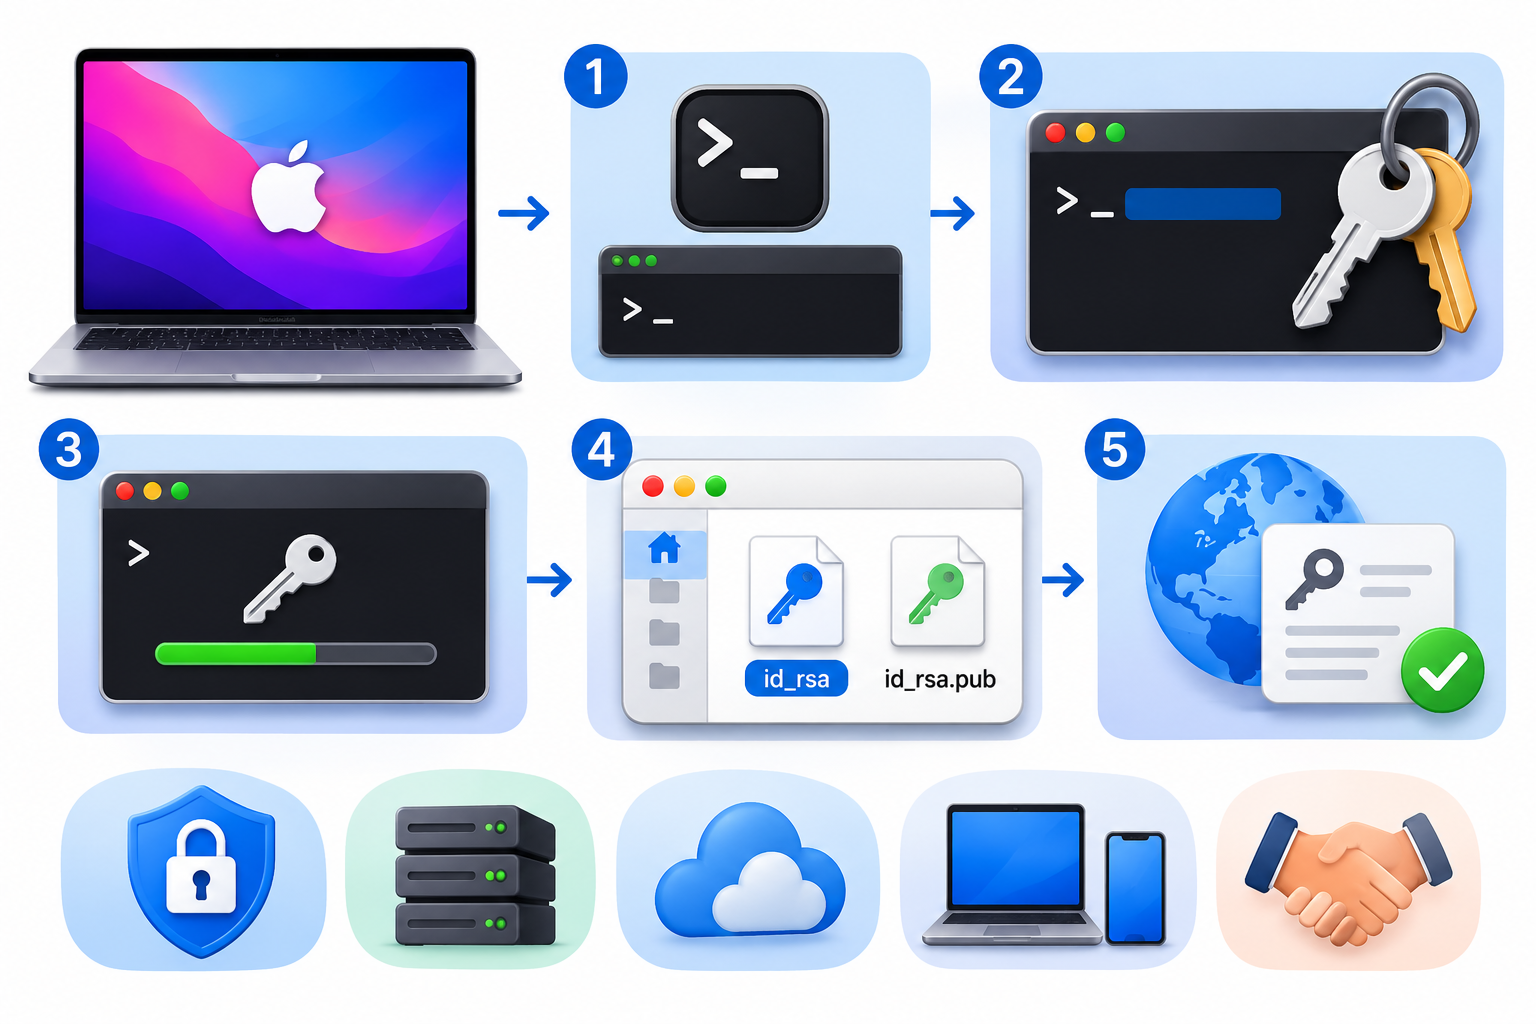
How to Generate SSH Keys on macOS
macOS supports SSH key generation through its built-in Terminal application.
Step 1: Open Terminal
Open Finder, navigate to Applications, select Utilities, and launch Terminal.
Step 2: Check for Existing SSH Keys
Run:
ls -la ~/.ssh/
Check for existing SSH key files before generating a new pair.
Step 3: Generate an Ed25519 SSH Key
Run the following command:
ssh-keygen -t ed25519 -C “[email protected]”
Step 4: Select a File Location
When prompted, press Enter to save the key in the default .ssh directory.
If you already have a key pair, use a different filename to avoid overwriting your existing credentials.
Step 5: Set a Passphrase
Enter a secure passphrase to protect your private key.
Step 6: Verify Your Keys
Run:
ls -l ~/.ssh/
You should find:
id_ed25519
id_ed25519.pub
Your SSH keys are now generated and ready for use.
You can also apply the recommended file permissions using:
chmod 700 ~/.ssh
chmod 600 ~/.ssh/id_ed25519
chmod 644 ~/.ssh/id_ed25519.pub
How to Generate an RSA SSH Key
Some older servers, applications, or SSH clients may not support Ed25519 keys.
In these situations, you can generate an RSA key pair with a 4096-bit key length.
Run:
ssh-keygen -t rsa -b 4096 -C “[email protected]”
The command options mean:
- -t rsa: Selects the RSA algorithm.
- -b 4096: Specifies the RSA key length.
- -C: Adds an identifying comment.
Follow the prompts to select a storage location and set a passphrase.
The default generated files are:
~/.ssh/id_rsa
~/.ssh/id_rsa.pub
Use RSA when compatibility requirements justify it. For modern systems that support Ed25519, there is generally no need to choose RSA simply because it is familiar.
How to View and Copy Your SSH Public Key
After generating an SSH key pair, you may need to copy the public key to your VPS or another remote server.
Linux and macOS
Display the public key using:
cat ~/.ssh/id_ed25519.pub
To copy it directly to the clipboard on macOS:
pbcopy < ~/.ssh/id_ed25519.pub
On Linux, if xclip is installed and an X11 clipboard is available, use:
xclip -selection clipboard < ~/.ssh/id_ed25519.pub
Windows PowerShell
Display the public key:
Get-Content $env:USERPROFILE\.ssh\id_ed25519.pub
To copy it to the Windows clipboard:
Get-Content $env:USERPROFILE\.ssh\id_ed25519.pub | Set-Clipboard
Copy the complete public key, including its key type and identifying comment.
Important: Only share your public key. Never copy or upload your private key (id_ed25519) to a remote server, website, or third-party service.
How to Verify an SSH Key Pair
It is good practice to verify that your SSH key files have been generated correctly.
Step 1: Check the Public Key Fingerprint
On Linux and macOS, run:
ssh-keygen -lf ~/.ssh/id_ed25519.pub
On Windows PowerShell, run:
ssh-keygen -lf “$env:USERPROFILE\.ssh\id_ed25519.pub”
This displays the public key fingerprint and its associated information.
A successfully displayed fingerprint confirms that the public key file can be read and processed.
Step 2: Check Whether the Public and Private Keys Match
To verify that your public key corresponds to your private key, derive the public key from the private key.
On Linux and macOS:
ssh-keygen -y -f ~/.ssh/id_ed25519
On Windows PowerShell:
ssh-keygen -y -f “$env:USERPROFILE\.ssh\id_ed25519”
The command displays the public key derived from your private key.
Compare this output with the contents of your existing id_ed25519.pub file. The key material should match.
If the private key is protected with a passphrase, you will be prompted to enter it.
This provides a more meaningful check than simply confirming that both files exist.
How to Use an SSH Agent to Manage Your Keys
An SSH agent is a utility that securely manages private keys for SSH authentication.
Instead of repeatedly entering your private key’s passphrase, you can load the key into the agent. Your SSH client can then use the loaded key when connecting to remote systems.
Linux and macOS
Start an SSH agent in the background:
eval “$(ssh-agent -s)”
Add your private key:
ssh-add ~/.ssh/id_ed25519
The agent will prompt for your passphrase if the private key is protected.
To list the keys currently loaded into the agent, run:
ssh-add -l
Windows
Open PowerShell as an administrator and configure the SSH agent service:
Set-Service -Name ssh-agent -StartupType Automatic
Start-Service ssh-agent
Then open a normal PowerShell window and add your private key:
ssh-add $env:USERPROFILE\.ssh\id_ed25519
You can check loaded keys using:
ssh-add -l
The SSH agent helps manage keys, but it does not replace the need to protect your private key and computer.
How to Protect Your SSH Private Key
Your private key is an important authentication credential. Anyone who obtains it and can use it may be able to access servers that trust its corresponding public key.
Follow these practices to protect it:
- Use a strong passphrase: Protect your private key with a unique passphrase.
- Restrict file permissions: Ensure that unauthorized users cannot access your private key.
- Never share private keys: Only transfer public keys to remote servers.
- Use separate keys when appropriate: Different keys for different servers or projects can make access management easier.
- Keep a secure backup: Store a protected backup if you need to preserve access to systems that depend on the key.
- Remove unused access: When a key is no longer needed, remove its public key from the relevant server’s authorized_keys file.
- Protect your computer: Use appropriate operating-system security and account protections.
If your private key is lost or compromised, generate a replacement key pair and remove the old public key from every server that trusts it.
Common Mistakes When Generating SSH Keys
Although generating SSH keys is straightforward, a few mistakes can create problems when configuring server access.
Here are some common issues to avoid:
- Overwriting existing keys: Generating a new key with the same filename can replace an existing private and public key pair. Choose a different filename when necessary.
- Sharing the private key: Never share your private key. Only the public key should be transferred to the remote server.
- Skipping the passphrase: Leaving the passphrase empty removes an additional layer of protection for the private key stored on your computer.
- Using an unsupported algorithm: Older systems may not support Ed25519. Check compatibility before selecting a key type.
- Copying an incomplete public key: When transferring a public key, copy the entire line rather than only part of its contents.
- Ignoring file permissions: Incorrect permissions can cause SSH clients to reject private keys or expose them to other local users.
- Losing the private key: If you lose the private key, you cannot use it to authenticate. You may need to generate a replacement and update server access.
- Confusing key generation with authentication setup: Creating a key pair is only the first step. The public key must also be installed on the remote server.
Frequently Asked Questions
