
Hey there! Ready to make your business emails super secure and trustworthy? You’re in the right place! Setting up email authentication for your Google Workspace is like putting a security badge on your emails that says, “Hey, this is really from me!”
Whether you’re running a small business in Lahore or managing a big company in Karachi, this guide will help you keep your emails safe from spam and scammers. Let’s dive in!
What’s Email Authentication All About?
Think of email authentication like having an ID card for your emails. Just like you show your ID at the bank to prove you’re really you, email authentication proves to email services that your messages are really coming from your business domain.
Here’s the simple truth: Without email authentication, your business emails might end up in spam folders, or worse — bad guys might pretend to be you and send fake emails to your customers. Not cool, right?
Why Should You Care About This Stuff?
Guess what? Email authentication isn’t just some techy thing — it’s actually super important for your business! Here’s why:
- Keeps Your Emails Out of Spam
When you set up authentication properly, email services like Gmail, Outlook, and Yahoo trust your messages more. This means your important emails actually reach your customers’ inboxes instead of getting lost in spam folders. - Protects Your Brand Name
Nobody wants scammers using their business name to trick people! Email authentication stops the bad guys from pretending to be your company. It’s like having a bouncer for your email domain. - Makes You Look Professional
Authenticated emails often show a checkmark or a “verified sender” label. It’s like having a blue checkmark on social media — it shows you’re the real deal. - Follows New Email Rules
Since February 2024, Gmail and Yahoo require proper email authentication for businesses that send lots of emails (more than 5,000 a day). If you don’t follow these rules, your emails might get blocked completely.
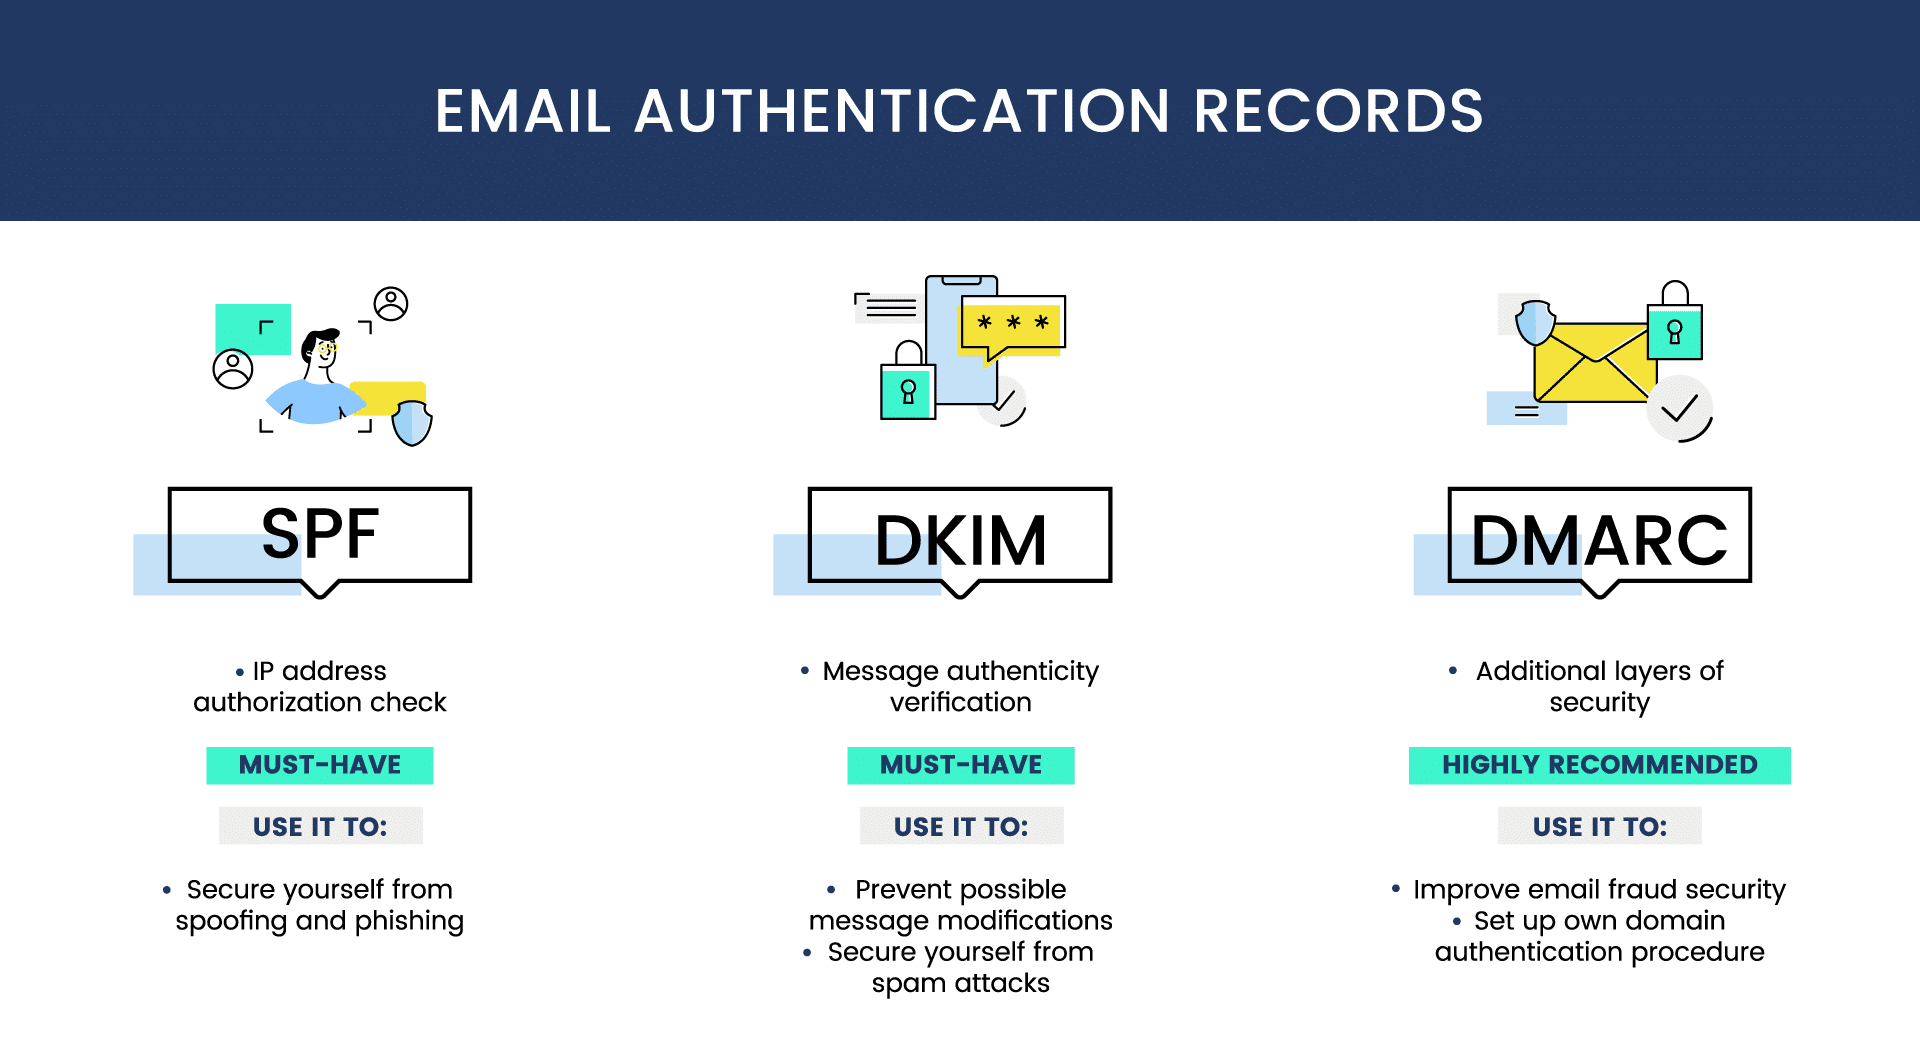
The Three Main Players: SPF, DKIM, and DMARC
Don’t worry — these aren’t as scary as they sound! Think of them as your email’s three security guards:
- SPF (Sender Policy Framework)
This is like a guest list for your domain. It tells email services which servers are allowed to send emails on behalf of your business. - DKIM (DomainKeys Identified Mail)
This adds a secret signature to your emails that proves they haven’t been changed or tampered with during delivery. - DMARC (Domain-based Message Authentication, Reporting & Conformance)
This is the boss that tells other email services what to do if an email fails the SPF or DKIM checks.
Setting Up Email Authentication in Google Workspace
Isn’t that neat? Setting this up is easier than you think! Here’s your step-by-step guide:
Step 1: Get Into Your Google Workspace Admin Console
First things first — log into your Google Workspace Admin Console at admin.google.com using your admin account.
Step 2: Navigate to Gmail Settings
Once you’re in, click on Apps → Google Workspace → Gmail. Think of this as finding the email control room in your workspace.
Step 3: Set Up SPF (The Guest List)
For SPF, you’ll need to add a special record to your domain’s DNS settings:
- Go to your domain provider’s DNS settings (like GoDaddy, Namecheap, CreativeON, etc.)
- Add a new TXT record
- Use “@” for the name
For the value, enter:
v=spf1 include:_spf.google.com ~all
This tells email services that Google is allowed to send emails for your domain.
Step 4: Set Up DKIM (The Secret Signature)
Back in your Google Admin Console:
- Click on Authenticate email
- Choose your domain from the dropdown
- Click Generate New Record
- Pick 2048-bit key if your domain provider supports it (it’s more secure!)
- Click Generate
Now you’ll get a special code to add to your domain’s DNS as a TXT record. Copy this code and add it just like you did with SPF.
After adding it to DNS, come back to Google and click Start Authentication.
Step 5: Set Up DMARC (The Boss)
For DMARC, you’ll add another TXT record to your DNS:
- Create a new TXT record
- Use _dmarc as the name
Start with a basic policy like:
v=DMARC1; p=none; rua=mailto:your-email@yourdomain.com
- This tells email services to monitor your authentication but not take any action yet. Later, you can tighten security with these options:
- p=none → Just monitor (starting point).
- p=quarantine → Suspicious emails go to spam.
- p=reject → Block suspicious emails completely.
Common Questions People Ask
