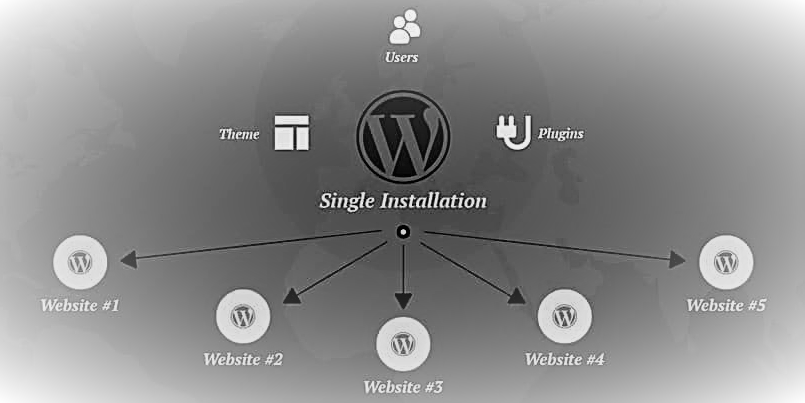
As the name suggests, the WordPress multisite feature allows you to manage multiple sites under the same WordPress installation on your host server without difficulty. And you can manage them through a single dashboard, saving you from creating separate WordPress installations.
It is one of the top trusted solutions for businesses and institutions that have to run multiple websites because it allows the users to build a network of subdomains or subdirectories. For example, if a business has the main website by the domain name of www.business.com, they can have subdomains like site1.business.com and site 2.business.com or could create subdirectories like business.com/site1 or business.com/site2. Colleges and universities could also benefit from this feature to create subdomains/subdirectories for different departments.
Working Process of WordPress Multisite
Super admin and site admin are two different things, and to understand the working of WordPress multisite features, it is important to comprehend the differences between these two. The super admin, which is also known as network admin, controls a whole network of websites and grants users permission to make new websites or accounts. Super admins have access to the Network admin settings and the dashboard of every website available in the network; they also have to map custom domains.
On the other hand, a site admin has administrative access to just one website within a WordPress multisite network. But the super admin has the authority to allow them access to more than one site in the network. The site admins can add users to the website accessible to them. They can decide which WordPress to activate or deactivate, but they can not install new plugins.
When to use WordPress Multisite?
WordPress Multisite is a suitable option for users who run more than one site at a time; it allows sharing of code like WP plugins, core files, themes, etc. But here comes categorization. If you run multiple sites that are completely unrelated to each other, for instance, one site is about food, and the other is about education, then WordPress multisite is not the right choice for you. On the other hand, if you have one site about food and another about catering, you can benefit from it because all of the sites are managed, and the network admin enables the features. The people running one site can opt for a WordPress single site for management.
Advantages and Disadvantages of WordPress Multisite
No matter how popular something is, it always has some downside to it. Let us now discuss some advantages and disadvantages of WordPress Multisite and do a cost-benefit analysis.
Advantages:
We shall discuss the pros first, and they are as follow:
- Management efficiency: Due to network admin’s management efficiency saves you from exhaustion and allows you to install plugins and security, perform backups, and update your sites from a single dashboard.
- Easy allocations: You can easily allocate lower-level admins to different sites within your network.
- More control: WordPress multisite allows you to control the use of plugins and themes by each site, reducing the risk of a bad plugin or theme jeopardizing the security of your entire network.
Disadvantages:
Now let us go through the disadvantages that WordPress Multisite carries, and they are as follows:
- Vulnerability: WordPress multisite only allows backups and updates network-wide because of the shared database. Moreover, if the shared network is down, all the sites will crash simultaneously because of sharing the same server. Similarly, in case of a security breach, all the sites within the network will be exposed to the cyber attacker or virus, hence compromising everything at once.
- Interdependency: Because of shared server and resources, all sites’ performance depend on each other. If one site faces a flow of traffic all of a sudden, the other side faces the consequences as well, and its performance would be affected.
- Limit: You will find yourself with few plugins and theme options because not all of them support Multisite. And not all web hosts support Multisite as well.
How can you set-up Multisite on Subdirectories?
Installing WordPress Multisite is the next step after deciding whether it is the right choice for you. It can be done automatically through the hosting account’s control panel, depending upon your hosting provider; therefore, choose the hosting plan with the multisite feature. For activation, you would need the following things:
- A web hosting compatible with Multisite.
- A new WordPress installation is a better choice but if you are going with the older version, then make sure to deactivate the plugins and create a backup first.
- An FTP client access through your WordPress installations.
Let us now talk about the setting process of Multisite in detail.
Update the wp-config.php File:
To begin with, you need to edit your website’s configuration files, and these wp-config.php files are located in the root directory of your website. It contains your database, hostname, username, and password. To edit these files:
- Open the FTP client and log into your website.
- Go to the root directory, also called public_html.
- Move to the wp.config.php files and right-click to select the Open/Edit option.
- Enter the codes consulting your host providers and click the Save Changes option. And your Multisite feature will be activated.
Set up your Network Admin:
The next step in activating the Multisite feature is logging into your WordPress website and heading to the admin area to find the Network Setup screen under Tools. It is where you can set up and activate WordPress Multisite feature. WordPress will encourage you to deactivate all the plugins prior to this configuration. Below the Address of Sites in your Network, select whether you want subdomains or subdirectories. Be careful while choosing because this step will affect all sites within your network and cannot be changed later. Enter the name of your network in the Network Title under the Network Details, and make sure to enter the email address of the super admin in the Network Admin Email section. After confirming all the information, press Install.
Edit the wp-config.php and .htaccess files:
Because of the technical nature of these steps, you would require a knowledge of coding and computing languages. If you are not eloquent in these, leave it to the professionals like your hosting providers or web developers; but if you have the skill to do that by yourself, then carry on with the process and edit your wp-config.php and .htaccess files from your root directory and save the changes afterward.
Access the Multisite Installation:
After following the above steps, log back into your WordPress admin area and find a new menu of My Sites in the new network administrator navigation. It will allow you to access Network Admin Screens and the basic or original dashboard as a super admin. You can use the main WordPress site as normally as you did. The Network Admin Screens will allow you to manage sites’ user accounts, and every time when a new site is created, a new tab is added in the drop-down navigation menu under My Sites.
How to Configure WordPress Multisite with Subdomains?
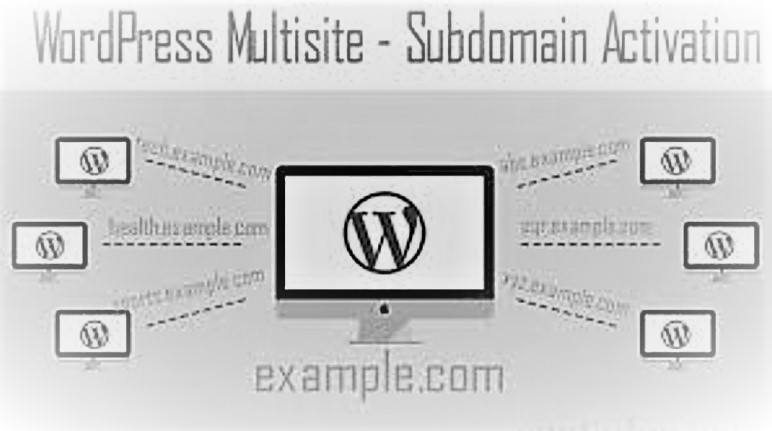
If you are to create subdomains, you will encounter pop-up messages suggesting you edit your wp-config.php and .htaccess files. In order to do so, you must have command over coding and other technical knowledge about web development. Otherwise, leave it to the professionals, and they will set up the Multisite feature for you. After editing the files, you must create subdomains using the public_html directory boxes or check the custom folder for subdomains. Finally, your Multisite with subdomain is all set up and ready to use.
How can you add new sites to WordPress Multisite?
Let us now discuss how you can add new sites to your Multisite Network. Because after completing the installation process, you will need to add new sites to the network to manage them coherently. The site you want to enter should have a proper URL (either you have set up for subdomains or subdirectories), a title that is visible to the audience, and an admin email (for the lower-level administration and only has access to the specific sites).
First, access the site setting by navigating to the Site button on the left side of your network admin screen and clicking Add New. It will open a page in front of you with the configuration options for the new site. Please fill in all the options on the page, including the new site’s address, its title, language, and the admin’s email. Press Add Site button. Repeat this process every time you want to add a new site.
How can you manage Themes and Plugins within Multisite?
Only the super admin has access to install new themes and plugins. So you will be in charge of managing your website’s network. The installation process is very similar to that of a standard WordPress site. The difference is all the themes and plugins installed will be applied to the whole network of websites.
After installing the plugins, the super admin can either activate it for the whole network or make it optional. In the former one, any plugin activated will run on all the sites in the network, so use performance-optimization tools such as security or caching plugins, and the sites cannot deactivate these plugins on their own without the permission of the super admin; the latter one allows the site admins to activate any installed plugin. The super admin can also configure site admins’ privileges through the Settings tab on their multisite dashboard.
For themes, the super admin can make available the activated themes to all sites, and you can activate them from the dashboard of every site. It will allow you to activate it on the sites of your choice. This means that these themes remain invisible to the site admins, and only the super admin can see them.
How to add a New User to the Multisite?
A super admin has the authority to add new users as network or site admins. Go to the network admin Settings, head to the Users option, and click Add New. Fill in all the details asked on the page that appeared before you, including the user’s username and email address. Click on Add New. As soon as you click on Add New, the user will receive a link on their email address inviting them to set the password. To change a user’s account and permissions, navigate to Users and press All Users. From here, you can grant users super admin privileges as well.
Site admins can also add new site admins by going to their site admin’s screens, navigating to Users, and clicking on Add New. They can choose from the existing users within the multisite network or add new ones by filling in the information asked on the page opened before them and providing the user’s username and email address. Click on the Skin Confirmation Email to notify the users about their new status.
How can you configure WordPress Network Settings?
You can start using WordPress Multisite as soon as it is activated, but it is better to check the network settings and adjust them according to your requirements first. From your network admin dashboard, go to Settings and navigate to Network Settings. Registration Settings can allow you to configure if the site admins can add new sites or new users. A super admin can also activate registration notifications to receive emails when some changes occur. You can also limit the type and size of the attachments users can upload from the Upload Settings section. It can help you to make sure that the network is not overloaded with such files that your hosting plan cannot handle.
How to store Media Files on WordPress Multisite?
Every site on the Multisite network has a separate media directory that is only accessible by the site admin and the super admin. Any site admin does not have access to another site’s directory.
After activation of Multisite in standard WordPress installation, a new folder, Sites, is created in the wp-content/uploads directory. It creates all the uploaded media from all the sites within the network. Every time when a new website is created, a new folder for that site is added to the site’s folder. Therefore, when you are uploading any file to a website within the network, rest assured that you upload it in the right sub-directory.
Let us go through how you can upload a file to a particular site in the network through File Manager. From your hosting control panel, open File Manager and then wp-content>Uploads>Site. Identify the correct IP for the site you want to upload the file to and upload the file there. If you want a shared media library for all the websites across the network, install the Network Media Library plugin for this purpose.
How can you use SSL with WordPress Multisite?
Keeping your website secure is the topmost priority of every owner. A Secure Socket Layer (SSL) certificate ensures encryption between the web browser and the website to ensure the secure exchange of information. Installing the SSL Certificate on the entire WordPress multisite network is very important because if a single site lacks the proper safety tools and falls prey to cyber-attacks, it will compromise the whole network.
If you set up WordPress multisite on subdirectories, you can have a single SSL Certificate for all your websites. On the other hand, if you have set up Multisite on a subdomain basis, you will require a separate SSL Certification for each website in the network. When hosting plans say free SSL Certificate, it usually is meant for the main domain or website; other domains or websites will require their Certificates.
Some helpful Plugins for WordPress Multisite
Plugins provide quick and better optimization for your WordPress sites. They often extend the functionality of a website. Let us have a look at the few best plugins that can improve your WordPress Multisite experience.
OptinMonster:
OptinMonster is a lead generator that helps improve your conversions using an opt-in email tool and a drag-and-drop from the builder. It helps in converting visitors who might abandon your site into subscribers, creating personalized market campaigns, and curating marketing content. It is also the best place to view your marketing analytics at the same place. Super admin can view these results of any lead generation across the websites and form plans accordingly.
Multisite Enhancement:
As the name suggests, it helps the super admin use the Multisite with enhanced features. It allows the super admin to view and customize all sites from a single dashboard instead of working with separate dashboards for each site admin. Super admins can also hide certain technical information from the site admin’s dashboard using the Multisite Enhancement plugin.
This article has presented all the pros and cons of using a WordPress Multisite, along with all the step-by-step guides to managing different features of your websites within the network. You will find everything in this piece, from adding a new website or user to creating subdirectories or subdomains. We hope our audience will able to get the maximum benefit from it.