According to Wikipedia, WordPress is an open-source and free content management system written in PHP and coupled with MariaDB or MySQL database with supported SSL Certification. It is used to build and host websites, providing you with plugins and templates to mold your website according to the needs of your business model. You can also use WordPress to create your blogs, portfolios, or entire online stores. It helps you throughout the process of creating your website or online store with multiple options in the sidebar. Therefore, it is a widely used platform throughout the world.

What is a Landing Page?
A landing page is the webpage of your online store or website on which you want your audience to land. Its main purpose is to generate leads and then convert these leads into sales. You put your content on this page and add images or videos to make it more engaging for the clients. A landing page is different from a homepage. A homepage is the welcoming page of your site. It has the name and some basic info about your company, multiple options, and all the products displayed on it. Its main purpose is to greet your audience and brief them about your services/products, whereas a landing page is where you provide services to the clients. Clients can subscribe or buy products from this page. Every product usually has its landing page. They are just restricted from carrying out the sales and have limited options.
How can a Landing page be more effective?
When creating a landing page for your website, you should consider the following things:
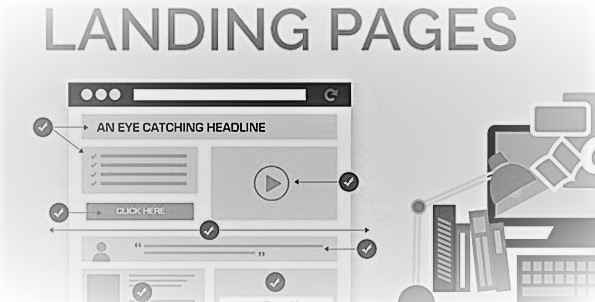
- Clear Call-To-Action: You should create a clear and precise landing page so that customers can avoid confusion and are convinced to buy your product, subscribe to your newsletter, or at least contact you. These are the steps that can convert the leads into sales.
- Divide the Sections: It is better to divide the sections on your landing page. Add separate images and backgrounds for each section. This will help the customer better understand the options and make navigation easier.
- Stay brief: It is highly advised to stay brief about your content and information. The more concise the content, the easier for the clients to understand. Lengthy passages tend to bore and distract people, and the purpose is lost. Keep your content organized to avoid confusion.
- Use Imagery: It has been proven that visual aid attracts more audience and makes it easier for them to understand the content. This simple step can be used to improve sales and generate profit.
- Use Colors: Colors are a great way to influence your audience’s mood. Different colors have different impacts on the mind. Therefore, it is useful if you use different background colors on your landing pages, keeping in mind the theme of your website. This will also improve the aesthetics of your site or online store.
How to create a Landing Page in WordPress?

There are three main categories through which you can create your landing page on WordPress which are:
- Create Landing Page in WordPress with a Plugin.
- Create Landing Page with WordPress Theme.
- Create Landing Page manually.
Create Landing Page in WordPress with a Plugin
WordPress provides its customers with multiple features to create a website. Landing pages can also be made easily on this platform. WordPress provides you with plugins. Below mentioned are the steps to follow when creating a landing page using plugins on WordPress:
Install a plugin:
Elementor, Divi, Beaver Builder, and SeedProd are some of WordPress’s plugins, particularly for Landing pages. In order to install a plugin, log into your WordPress dashboard, add a new plugin and search for your required plugin. Moving on, install and activate the plugin to start working.

Add a new Landing page:
After installing and activating the plugin, you will be redirected to the plugin dashboard, where you can start creating your landing page. Here you will see different landing page templates, i.e., Maintenance mode, Coming Soon mode, Login page, and 404 page. Select the one according to your need. Click the option for creating the Landing page below the type you selected.
Start editing:
The next step is to choose a blank or the desired template from the available options on the screen. Choosing a blank template means designing the Landing page from scratch. The immediate step after this is to put in the name of the page and the URL’s title. It is advised to use a commonly searched keyword in your URL to make it visible to more people. Save all the changes you have made and start editing in order to make the template into the landing page suitable for your website or online store. On the left side, you can see many options which you can use to add features to your landing page to make it more fun and attractive for the audience. On the right side, you can see the preview of your landing page. You can change the background color of your landing page, insert images and align your content to make your page more presentable. Click on the Global Settings button to do so. Another plugin called WPForms plugin allows you to use the add-on feature to change the newly made WordPress form into a custom landing page. There are options in the form of icons to help you delete, move, duplicate or save any block from aligning your page.
To create a landing page for eCommerce purposes, some plugins like SeedPro allow you to add other options like a shopping cart and product gids, to name a few. After creating your landing page, click on the Save button in the top right corner.
Link Third Party Tools:
It is better to link the company’s email to your landing page to expand your email list and convert leads into sales. Customers can contact you that way, or whenever anyone provides their email address, it will automatically be added to your email list. Simply, click on the Connect tab and select the services you want, like AWeber, Mailchimp, Drip, Sendy, etc.
Publish the Landing Page:
You are finally ready to publish your landing page on WordPress when all the editing is completed, and third-party tools have been attached. Click on the design tab and press the Publish button next to the Save button. You can see the results by clicking on the See Live Page.
You can customize your page in the future whenever you want using the Page Setting tab. It can also be used for SEO and to review the page’s analytics. WordPress also provides you the facility to connect as many landing pages to your custom domain name rather than using different WordPress sites. This feature is only available in the SeedPro premium version.
Create Landing Page with WordPress Themes:
You can also install WordPress themes to create your landing pages. This will let you change the design and layout of the page without having to change the theme. But it is noteworthy that not all WordPress themes provide Landing page templates; some that do are Astra (which provides you with more than 150 templates with integrated tools like Elementor and WooCommerce), Neve (which provides multipurpose themes that are compatible with WooCommerce and Gutenberg editor) and Potum Material (provides you full-width slider, call-to-action buttons, and animation features), to name a few. Follow the below-mentioned steps to create a landing page using WordPress themes:
Add a New Page:

Login to your WordPress dashboard and click on the Appearance tab to add a new theme from the options. Choose your desired theme and activate it. After setting up the theme, go to the Pages tab and add a new page from there. A blank page will appear before you. Give a suitable title to your landing page. Then set it as a static homepage to make sure that the customers will be directed toward the landing page when they select an option from the main page. This page on which you are working is different from your regular homepage. Go to the Settings tab from the dashboard, and in the Reading Settings, choose the name of the page you have set for the landing page from the homepage drop-down menu. Then press the Save Changes button.
Start Editing:
After saving all the changes, you are good to start customizing your landing page using WordPress editor like Gutenberg editor. Click on the plus box to see the available blocks. Choose the desired box and click on it to add it. After that, you can edit it through the Block tab by clicking on the three dots above it. To make your page attractive and recognizable, you can add product images with descriptions and social media links using Media and Text and Social Icon blocks, respectively.
Publish the Landing Page:
After customizing your page completely, you can click on the Preview button to see the landing page from the user’s perspective. When you are satisfied with the results, click on the Publish button in the top right corner, and you are good to go!
Create Landing Page manually:
If you have some coding knowledge and some HTML and CSS skills, you can create the landing page yourself. By using this method, you can make a more flexible and customized landing page. You have to use a page template and make the landing page from scratch. As it lies more on the technical side and is not easy for most people to carry out the process, we shall not discuss it here.
Landing pages are the main feature of any website or an online store. Therefore, it needs to be precise and catchy. The background colors play a significant role in catching people’s attention. Try to keep your uniqueness so people become curious and contact you to learn more about your product or services.

